


Tables in Confluence Cloud Tutorial

Where does your team collaborate and share essential updates? Let us guess! It must be Confluence by Atlassian. If you haven’t tried it yet, it’s never too late to level up your teamwork and corporate wiki.
In this article, we will show you how to work with tables in Confluence Cloud faster. Read it till the end and try our tips out to start building tables that are easy to read.
Why use tables in Confluence Cloud?
You often need to structure information in Confluence Cloud for other readers. When it comes to data visualization, we often feel frustrated. Confluence Cloud empowers users with many instruments, from page layouts to content formatting macros like panels or dividers. These options are great, but let’s face it, we tend to skip them and stick to good old tables.
Building tables in Confluence is one of the most intuitive ways to present important information and discuss it with your team. We love using tables for data visualization for many reasons:
- The table view keeps information structured.
- Readers instantly understand how to work with information in tables.
- Tables are fast and easy to create and format.
- You can reuse information between several tables or merge it into one.
- You can create advanced Confluence tables with dates, statuses, or other dropdowns.
Where to start?
Once you have the required data, you can create a table in Confluence Cloud. To add a table, you need to be in page edit mode. To open the editor, you can click the Edit icon on top of a Confluence page or just type E to open the editor.

Now you are ready to insert a new table. The Confluence Cloud editor offers several ways to do this:
- select Table in the toolbar
- start entering /table on a page
- press Shift+Alt+t
You can try all these methods and stick to the one you prefer. By default, a table with three columns and three rows will appear. It will have a header row.
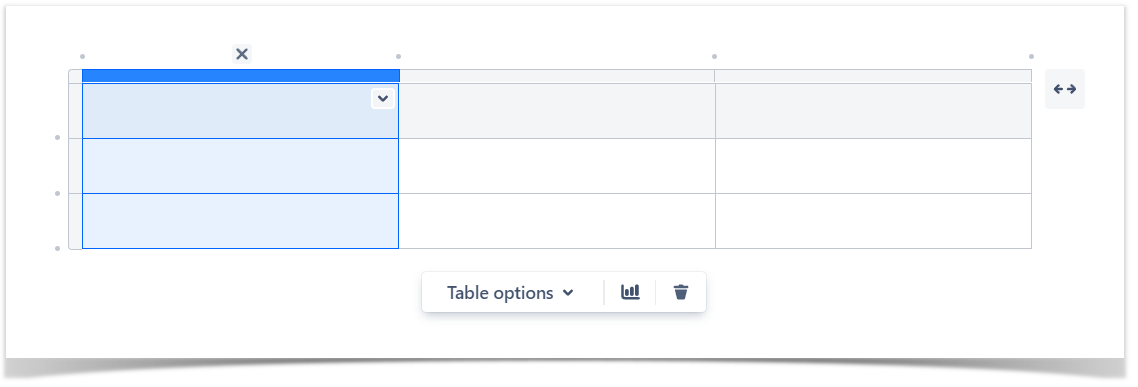
You can start adding your data to the table immediately or format the table to meet your needs.
How to format tables in Confluence?
You can customize the look and feel of your Confluence Cloud tables with the native features in a few clicks.
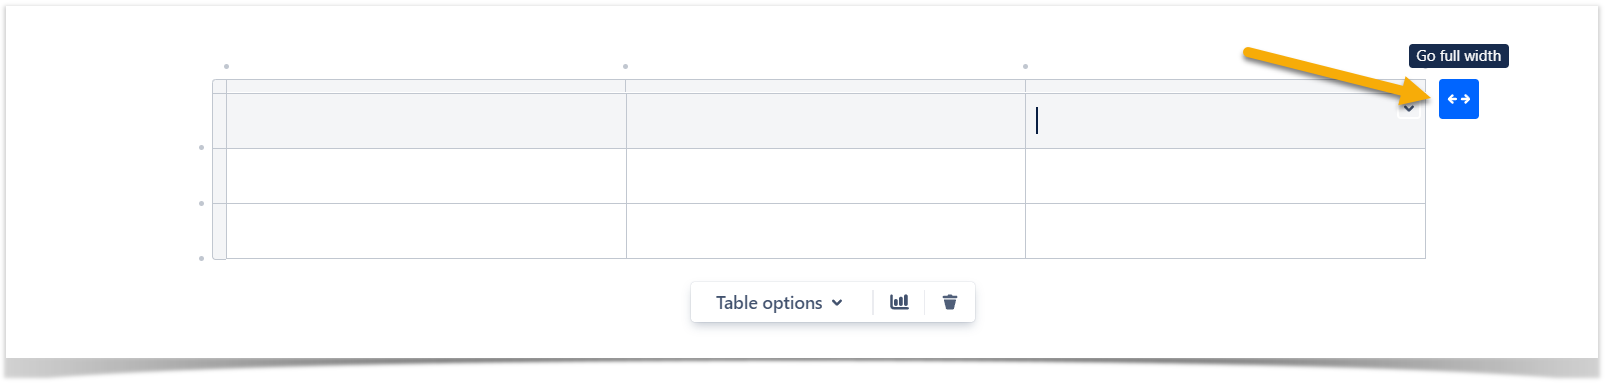
Consider the table width
Any table has the width selector to its right. Use it to pick the table size corresponding to your content. You can switch between centered, wide, and full-width. All tables are responsive and scale to the reader’s screen size. So readers will always get the best table view.
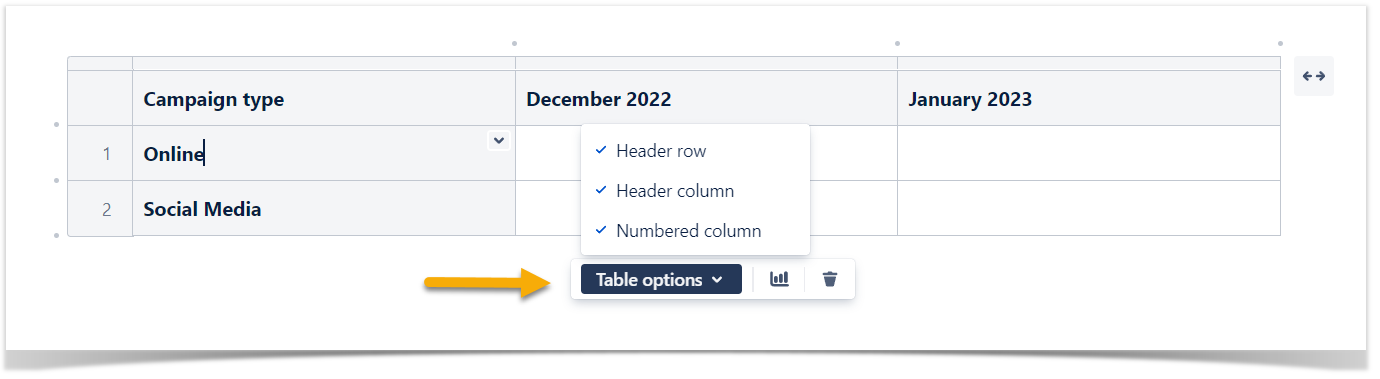
Configure table options
Once you’re editing your table, you can see the Table options button below. In the dropdown menu, you can select one of the three additional options available:
- Header row. Use it to transform your default table row into a header row with accents. This row gets a grey-shaded background and bold text.
- Header column. Use it to transform your default table column into a header column with accents. This column gets a grey-shaded background and bold text.
- Numbered column. Use it to number each row in a column automatically.
Configure cell options
If you need to change the number or design of your table cells, you can easily do this by clicking the down arrow. You can access it from any table cell or when several cells, columns, or rows are selected. Try the latter way for bulk editing your table cells or merging them.
In Confluence tables, you can:
- change a cell color (pick one of 21 available colors)
- insert a column to the right
- insert a row below
- remove a column
- remove a row
- merge cells
- split a cell (if previously merged)
- distribute columns
- clear cells
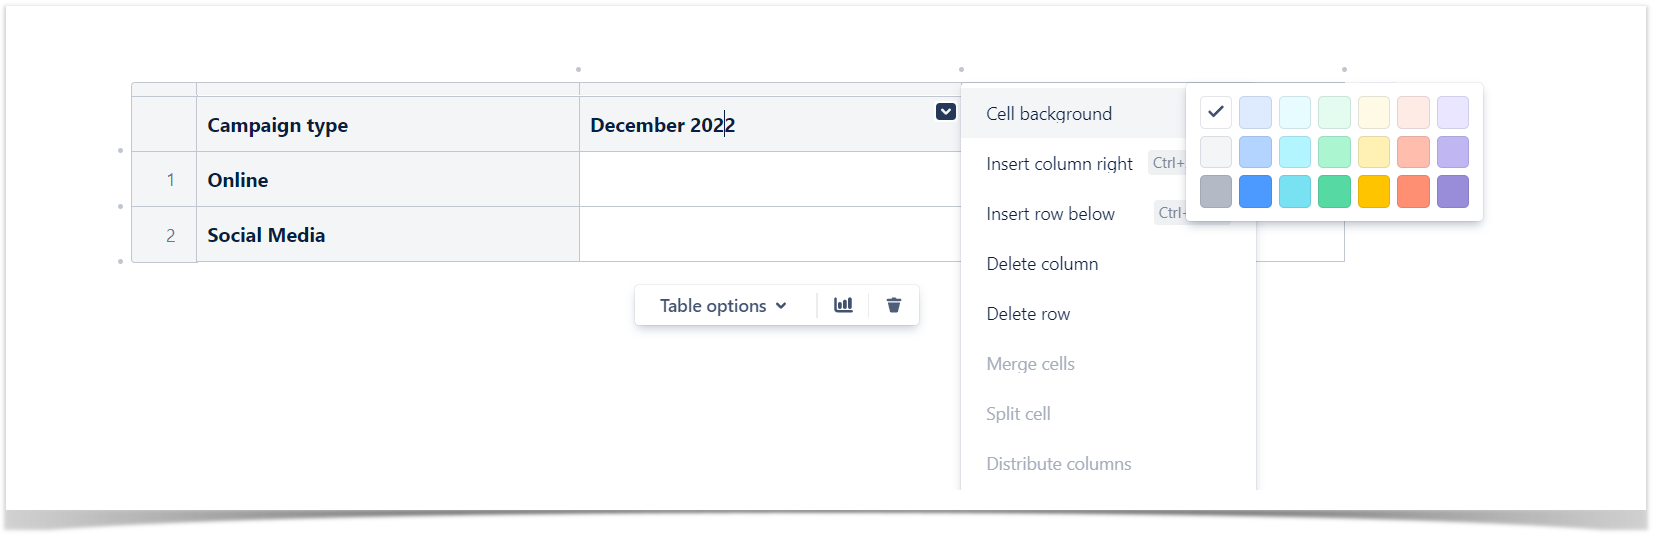
This functionality works fine for basic operations with a table. You can perform these default manipulations with columns and rows and adjust them to your needs. Try the cell coloring feature for a quick table design. The cell background color is an easy way to differentiate between the content and highlight what matters most.
How to upgrade the Confluence Cloud table?
Now you know how to create and customize the table in Confluence Cloud. Your table looks good and serves your readers as the data reference source. The information is all organized and easy to find.
But what if your table data is not stale and requires regular updates? You can edit your tables each time or try to add some dynamic elements to the table.
In the next section of the article, we will show you how to make your Confluence Cloud tables handy with Stiltsoft apps. Using them allows you to add dropdowns and date pickers to tables and filter and visualize table data later on.
Add dropdowns to Confluence tables
Time is the resource we value most. It’s OK to start editing the page to make many changes. But you would probably feel frustrated if you needed to switch the page back and forth to the page edit mode for minor updates. For this reason, we suggest creating dropdowns in your tables with our Handy Status. It’s available within the Handy Macros for Confluence app.
Handy Status is a good fit for tables that you often update. Despite its name, our macro allows changing statuses or other text options on a page. It allows you to add dropdowns to Confluence Cloud tables and pick new options without page edits. You can try Handy Status for your use cases and see how you speed up your table updates.
You can test Handy Status for adding dropdowns to Confluence tables if you want:
- create the options you need once and reuse them across pages
- update values when viewing a page without entering the edit mode
- stop typing values manually and speed up your work with tables
Create dynamic dashboards with Handy Status
Having a dynamic table sounds good. But what would you take on creating a dashboard based on our macro functionality?
Handy Status can set synchronization with the Confluence page label. It’s configured in the macro settings when you insert Handy Status into the page. Once enabled, this feature will link each Handy Status to the page label. The label changes after each status update automatically. If used with the Page Properties and Page Properties Report macros, this functionality allows you to create an interactive Confluence dashboard based on the Handy Status value.
Need to see the status changes quickly? Just navigate to the Status History tab. Here you can see who and when changed status values. Handy Status keeps up to fifteen last changes. They are always at hand if you need more control over the status updates for your workflow.
Add date pickers to Confluence tables
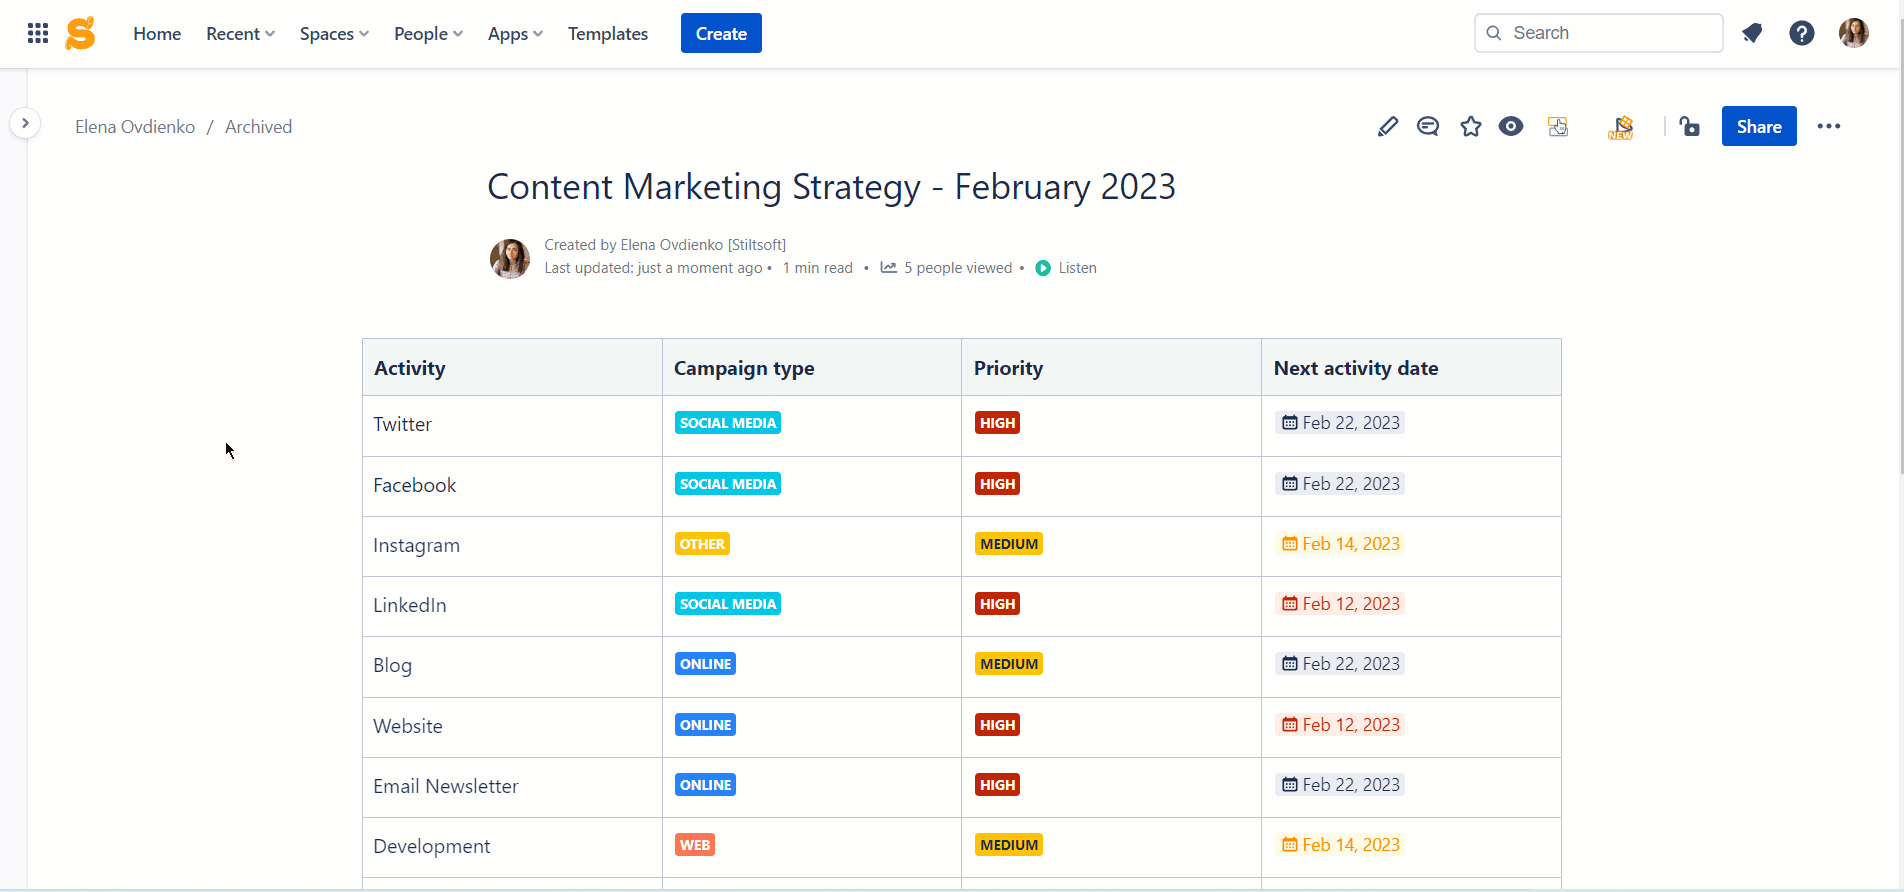
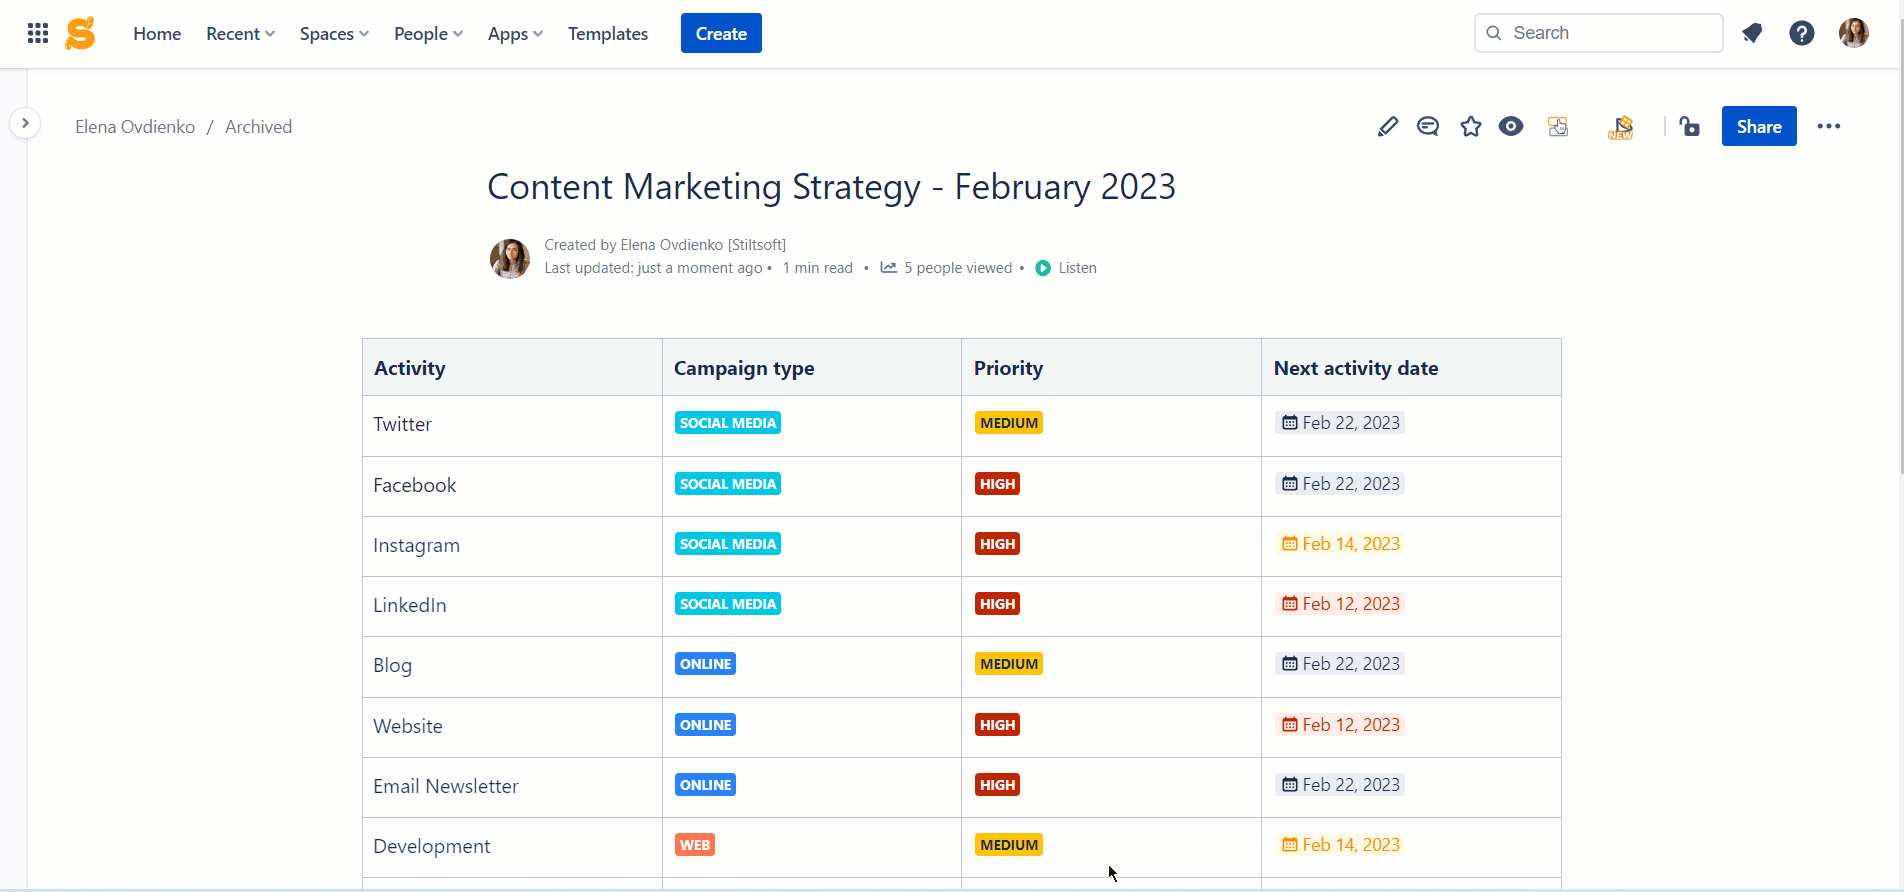
If you need the ability to update dates quickly, try our Handy Date. This macro allows you to select new dates in tables on the fly and save time on page editing.
Sometimes you need to highlight approaching dates and overdue tasks or indicate deadlines. You can get a better date visualization with the Handy Date macro coloring feature available on Cloud. You can enable the date color changes based on the date value when you insert our macro or edit it. Please note that the date coloring changes according to these rules:
- the current date – red
- all dates before the current date – red
- a week after the current date – yellow
- more than a week after the current date – grey
Date coloring is an optional functionality. If you want to stick to the default gray color, that’s fine. Just leave the toggle with date coloring off. You can change the Handy Date behavior at any moment, depending on your needs.
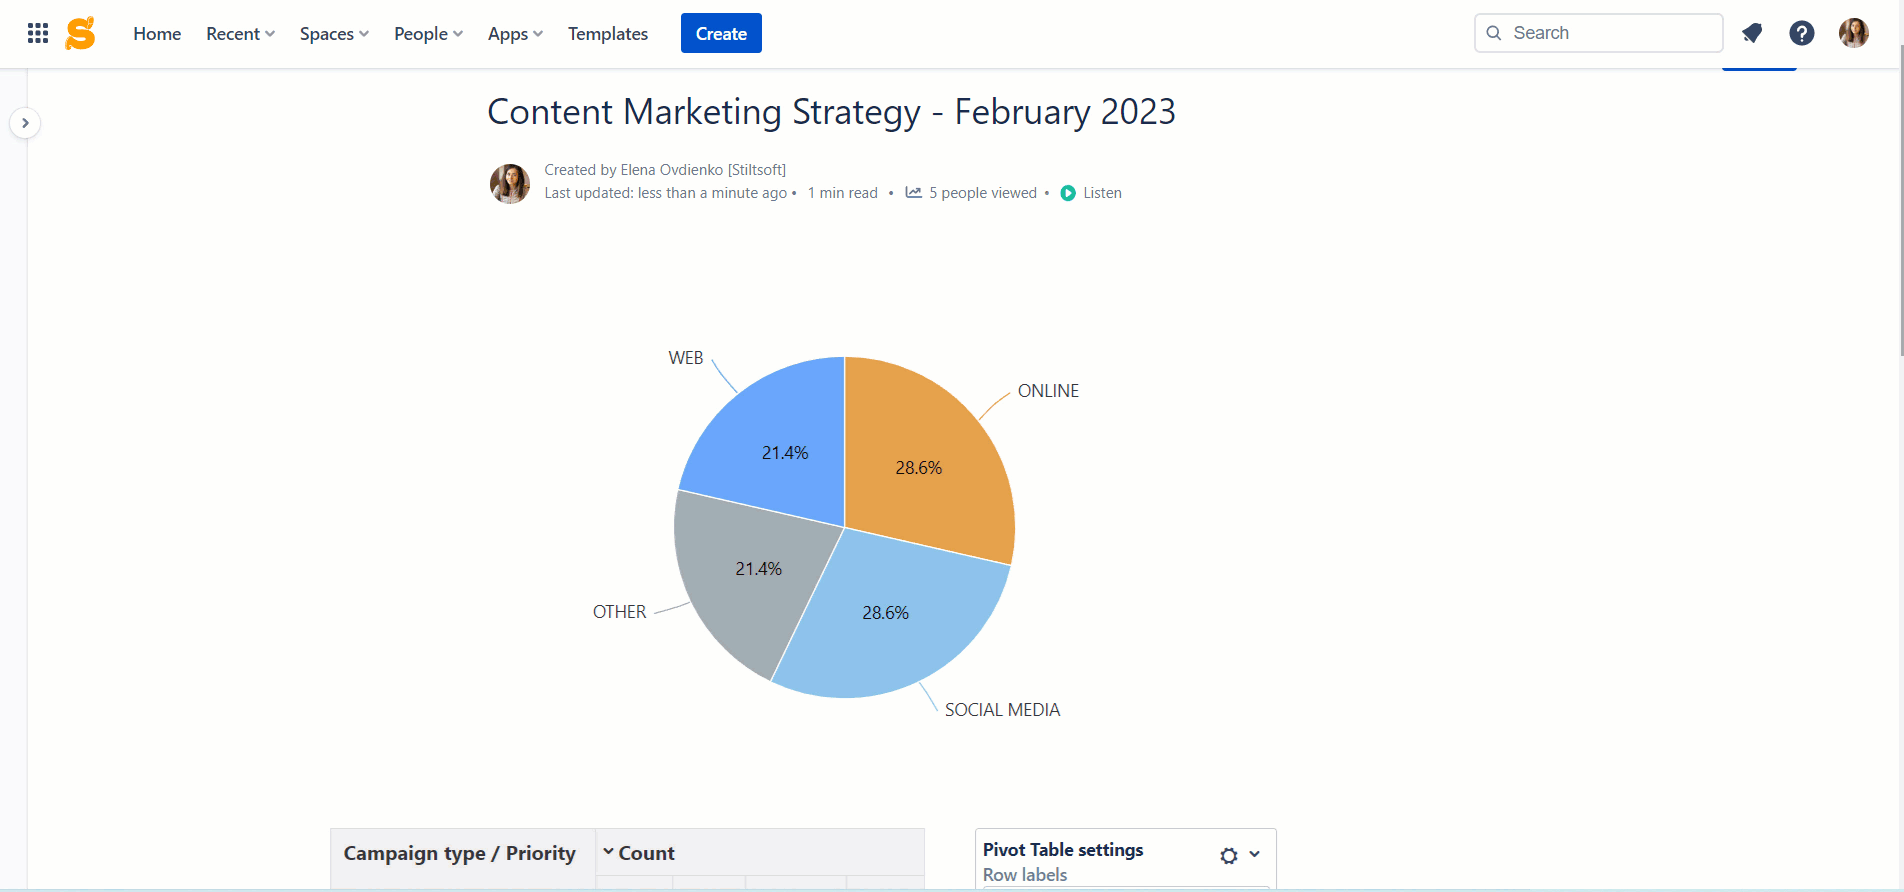
Filter and visualize your table data
Now you know how to create Confluence Cloud tables with text dropdowns and change statuses and dates on the fly. Adding Handy Statuses and Handy Dates works like a charm whenever you need quick updates.
But what if your tables contain many rows, and it’s hard to focus attention on what matters right now? We’ve got you covered!
Use the combination of Handy Macros and Table Filter and Charts for Confluence Cloud. The Table Filter and Charts app allows you to visualize table data with pivots and charts.
When used together, our apps empower your Confluence Cloud tables and allow you to:
- update table cells from dropdown options
- use interactive date pickers
- filter data in table columns
- create pivot tables based on dynamically updated table data
- build charts based on your interactive Confluence Cloud tables
Try to combine both apps for efficient and productive work with Confluence Cloud tables. You can save time on page editing and manual updates. Once you change the Handy Status value in your table, the corresponding pivots and charts reflect these updates. You can also read our article on how to work with tables in Confluence Cloud.
Think of your previous experience working with Confluence Cloud tables. Could it be better? We hope our article will assist you with faster resolution of your daily routine.
You can try our Handy Macros for Confluence and Table Filter and Charts for Confluence for free on the Atlassian Marketplace. Follow the links above to navigate the app listing pages and click Try it free. If you don’t see the button, please, contact your Confluence administrator to help you start with our apps. After the trial start, you will have 30 days to evaluate the app functionality in your company and see if it suits you.

Let us know if you have any concerns or suggestions.