How to automatically deploy add-ons to JIRA, Confluence, Bitbucket using TeamCity

Connect your Bitbucket to the TeamCity CI/CD server with TeamCity Integration for Bitbucket to run builds right from Bitbucket in one click, view build results, logs and artifacts right next to your code, and never lose time switching.
TeamCity from JetBrains is one of most famous systems that people use to build their own continous integration and continous delivery solutions. We at StiltSoft use TeamCity in our development process for different purposes, as follows:
- building add-ons
- running integration tests for checking add-on issues before their deployment to production systems
- running the code quality analysis with SonarQube
- deploying updates or add-ons to our test, staging or production instances
Today we’re going to tell you how to use TeamCity for automatic deployment of add-ons to Atlassian JIRA, Confluence or Bitbucket.
Problems we solved by automated deployment of add-ons
- Only the administrator was able to upload the add-on to the staging or production Confluence, JIRA or Bitbucket instances. Any developer or product owner had to request add-on deployment from the administrator, which slowed down the development process.
- Manual upload frustrates the people. You should get a link, download an artifact, open the application console and so on. Nobody loves the monkey job.
- We like what we develop. We always want to use the latest versions of our add-ons for completion of everyday tasks.
- We are exploring the ways to automate our testing and development processes and automatic deployment is the keystone there.
Before we go
You need to prepare a few things before you start to set up your deployment process:
- We recommend you to create a separate account in JIRA, Confluence and Bitbucket for automated add-on deployment. This account requires administrative privileges so use only strong passwords.
- You need a TeamCity build agent with Linux host OS.
- You need to install upmctl tool on your Linux machine with the build agent.
Setting up a TeamCity build configuration
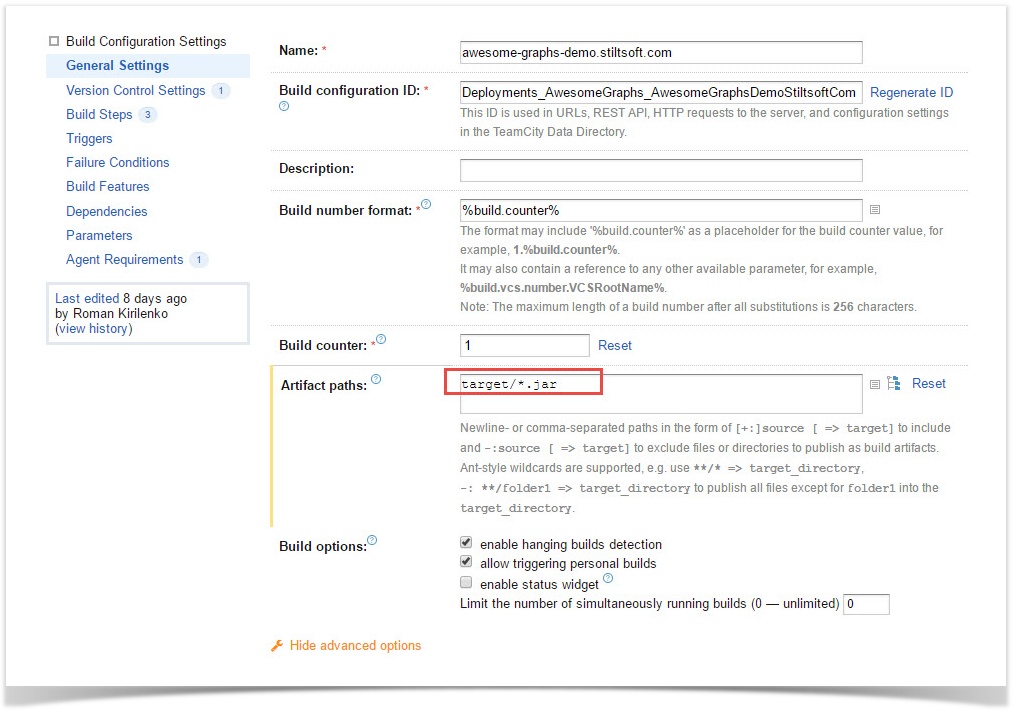
You should configure your build as usual (VCS settings, build step to build your application and so on). Remember the path for your artifacts:
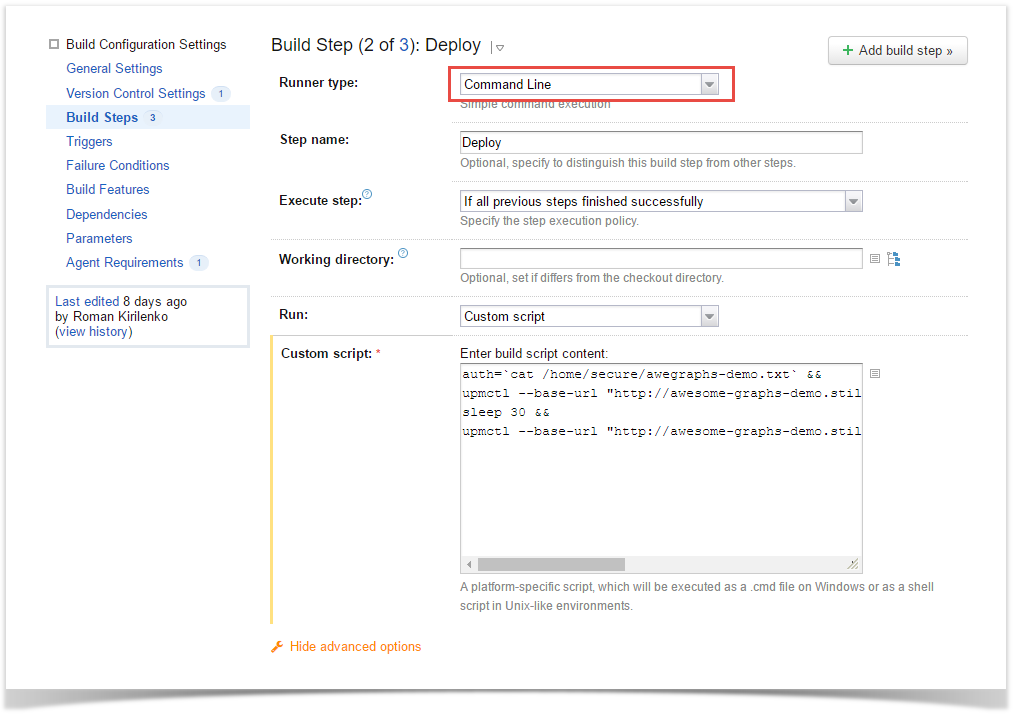
Then create an additional build step to deploy your artifact. You need to use a command line runner:
The script body in our case is:
auth=`cat /home/secure/awegraphs-demo.txt` &&
upmctl --base-url "http://awesome-graphs-demo.stiltsoft.com" --base-authentication=$auth delete com.stiltsoft.stash.graphs &&
sleep 30 &&
upmctl --base-url "http://awesome-graphs-demo.stiltsoft.com" --base-authentication=$auth install ./target/*.jar
The first line reads the login and password for your JIRA, Confluence or Bitbucket account with administrative privileges and passes to the shell variable. This was done intentionally to avoid usage of plain-text passwords in TeamCity due to security best practices. Your text file should look like this:
your_login:your_password
Then we call umpctl to delete the add-on from the instance using the shell variable with your login and password. You need to specify your add-on key for uninstalling it, as follows:
com.stiltsoft.stash.graphs
Next we take a 30 seconds pause to be sure that the add-on has been succesfully removed and finally install a new add-on via upmctl. You need to specify an artifact for upload. Use the artifact path and artifact name. In our case (we have only one artifact within this build) it looks like this:
./target/*.jar
How to improve your deployment build configuration
Different build steps can be included into the build configuration. You can add some steps to run integration tests or even configure deployment to production only when you have a succesful deployment to the test stand after passing all the tests. Your deployment configuration depends only on your workflow. Don’t forget to set automatic build failure if something goes wrong. This will help you to avoid problems with your code in production environment.
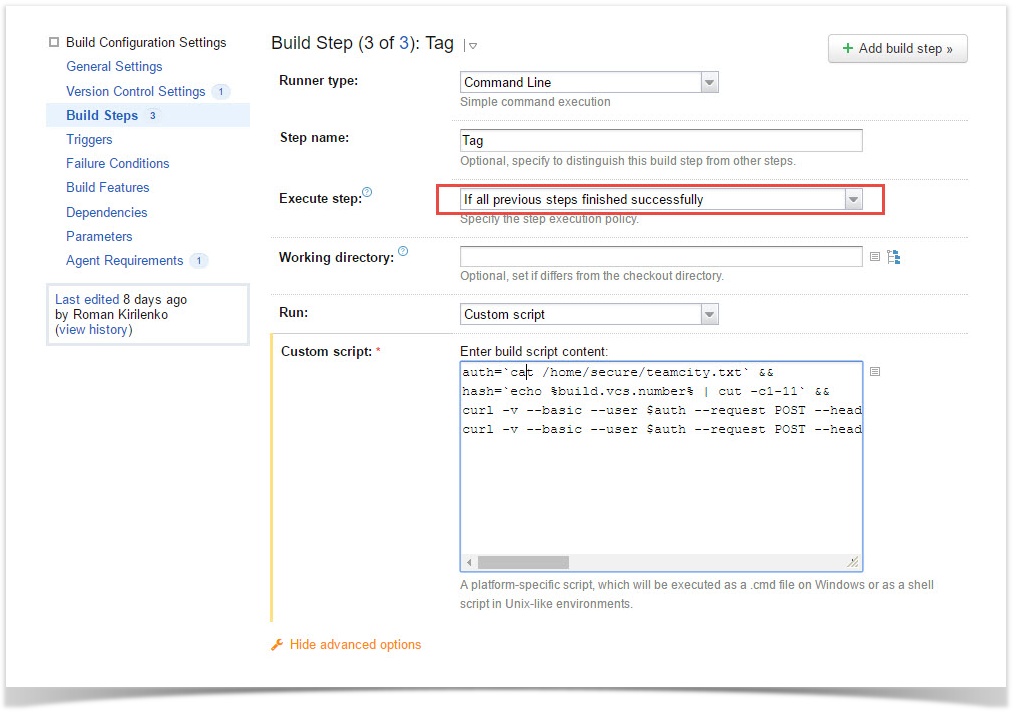
Use the power of Linux and TeamCity to build your own killing combo! For example you can set build tags using TeamCity REST API:
auth=`cat /home/secure/teamcity.txt` &&
hash=`echo %build.vcs.number% | cut -c1-11` &&
curl -v --basic --user $auth --request POST --header "Content-Type: text/plain" --data '%teamcity.build.branch%' "http://teamcity.stiltsoft.com/httpAuth/app/rest/builds/id:%teamcity.build.id%/tags/" &&
curl -v --basic --user $auth --request POST --header "Content-Type: text/plain" --data $hash "http://teamcity.stiltsoft.com/httpAuth/app/rest/builds/id:%teamcity.build.id%/tags/"
The example above sets two tags for the build in TeamCity. The first is a VCS branch used for deployment and the second one includes the first 11 characters of Git commit hash (as shown in Bitbucket).
Benefits that we got with automation
We have received some benefits after implementing this automation. You can get them too:
- Give your product owners an ability to quickly deploy the latest updates to your test (or even production) instances without having administrative privileges in JIRA, Confluence or Bitbucket in one click.
- Decrease the time needed to deploy these changes by removing unnecessary communication and requests between different teams.
- Get an ability to completely automate delivery of stable code right after each development iteration. Time period between commit to repository and production can be decreased to approximately ten minutes. Most of this time is spent on build and testing purposes.


