


Three Ways to Deal With Long Pages in Atlassian Confluence
Making changes to Confluence pages is a pretty straightforward task thanks to a user-friendly Atlassian Confluence editor. However, as implied by this highly voted feature request, many people find it annoying to edit really long pages.
As pages get more complex, scrolling back and forth and hunting for the part you want to edit can be pretty tiresome. Moreover, if someone else is editing the same page simultaneously with you, you’ll have to deal with resolving editing conflicts.
The general idea of solving this problem is to divide a page into several parts and edit them separately. In this post we’ll show some tools that can help you tackle this issue by so called sectional editing.
Include Macro
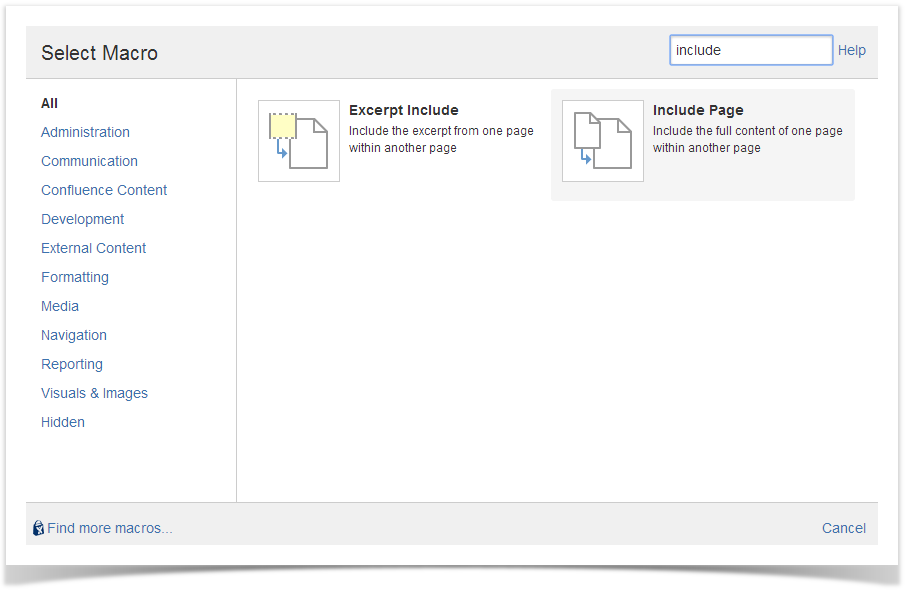
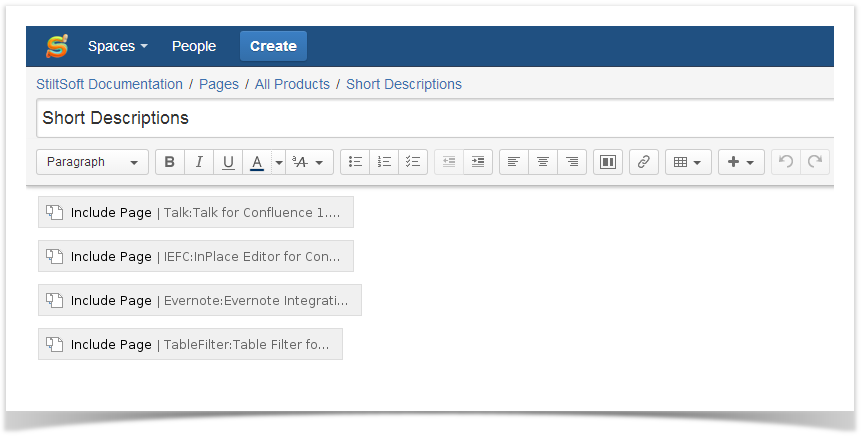
First solution is easy and doesn’t require installing any third-party tools. You need to compose a page of several shorter children pages that can be edited one by one with the macro Include Page that comes preinstalled with Confluence. On your main page locate Include Page in the list of default Confluence macros:
Insert the macro for every page you want to include. When you’re done you main page in the Edit mode will look like this:
Now, we want to make links that will take us to the Edit mode for every page so that you could quickly start editing a separate page. To do that, go to your children pages’ editors and copy the link from the browser address bar. Then go back to the main page, create a web-link called, for example, Edit and paste the address. It’s important to create a web link, because otherwise Confluence will convert an Edit mode link to a View mode link, and this is not what we want.
Create web links for all children pages and you’ll get something like this:
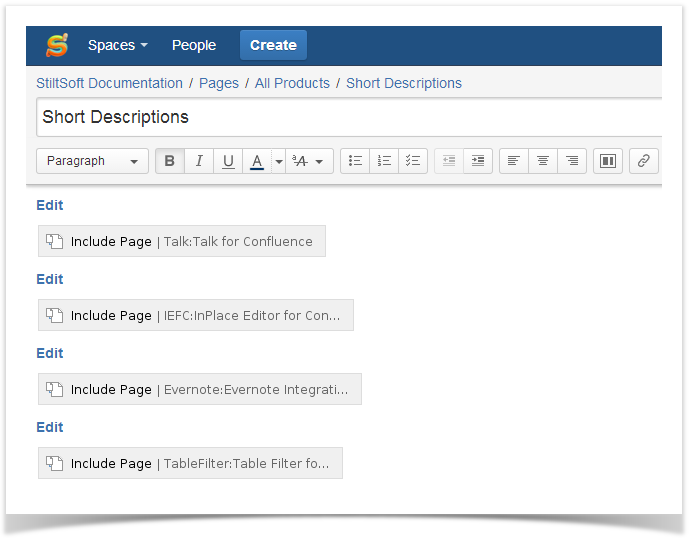
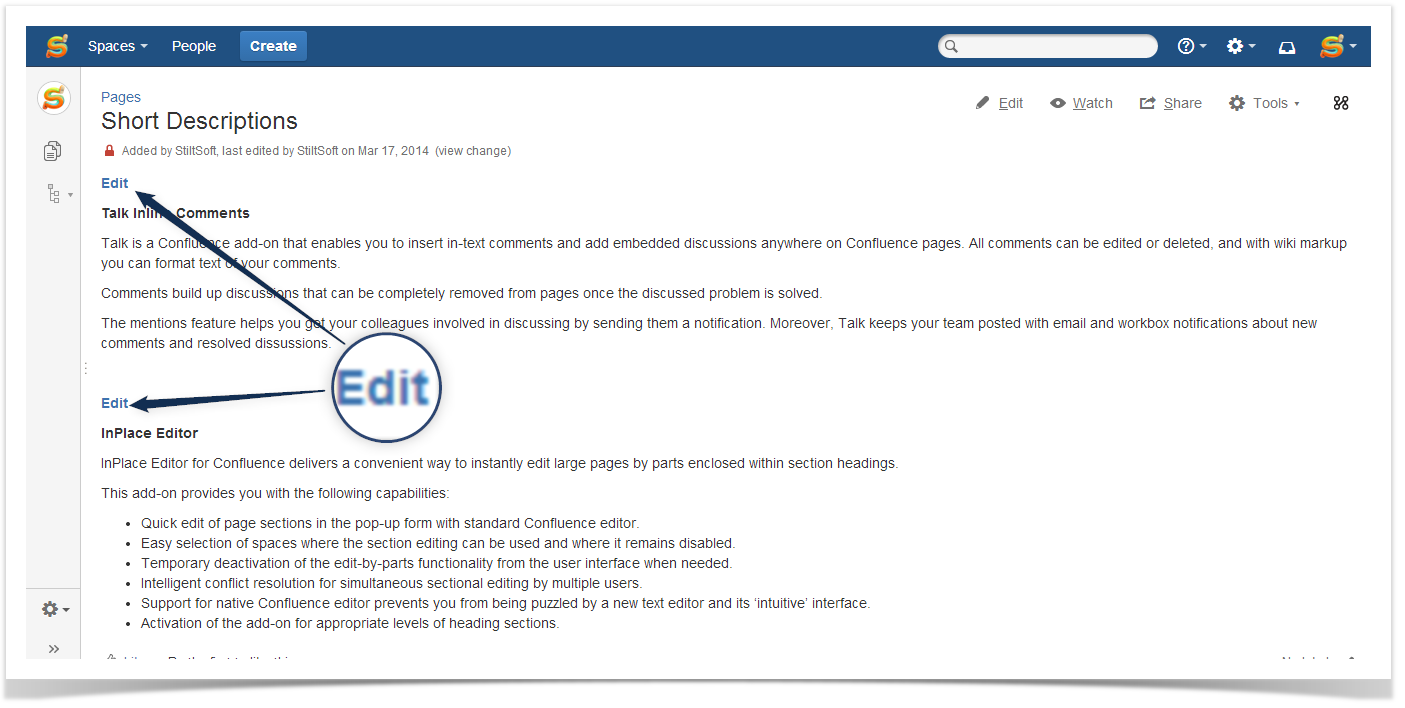
In the View mode you now can click the edit links to jump directly to a page editor.
This approach, however, has a couple of drawbacks. First, you need to create page sections manually and changing the page layout can be tricky. Second, every time you go to a children page editor you need to navigate back to your main page manually.
Zen Foundation Theme
This last problem is perfectly solved by using the Zen Foundation theme. It’s a custom theme that lets you easily create page sections and is full of other nice features like a drag&drop layout and flexible permission control.
But again, you need to create sections manually, and unless you’re a very small team, the prices can scary you off.
InPlace Editor
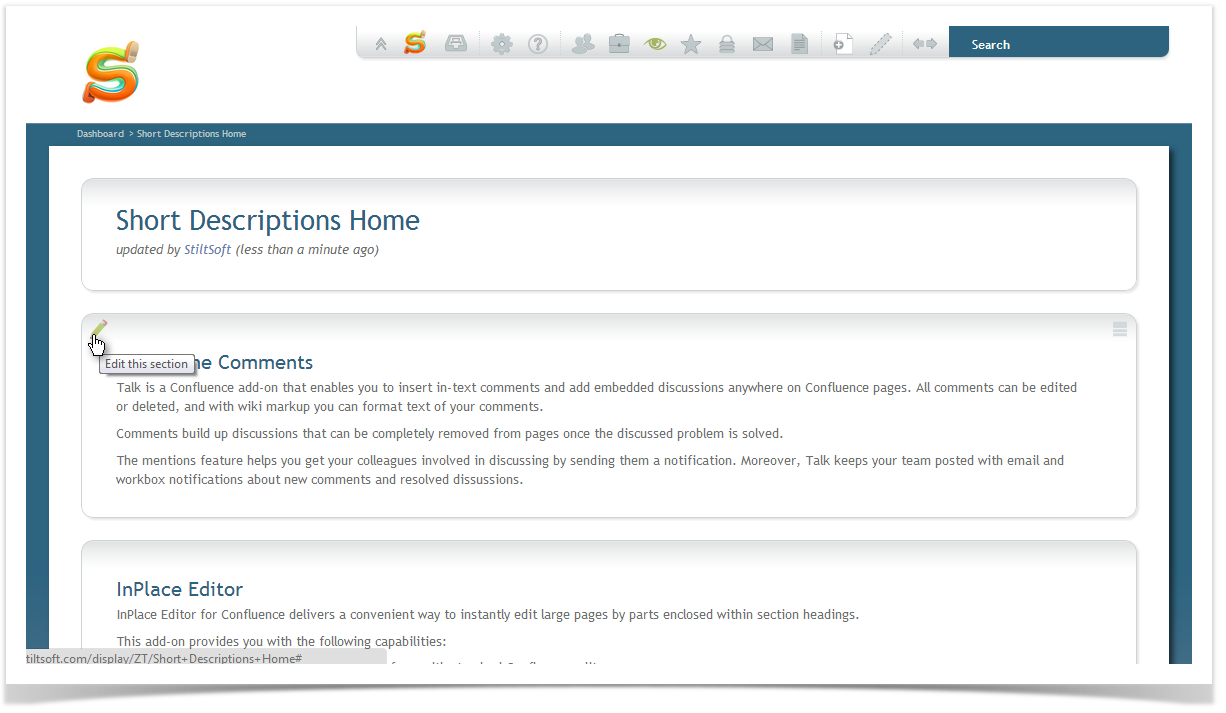
A cheaper and much easier solution is our InPlace Editor. If your page already contains headings, after installing InPlace Editor you’ll see small icons next to each of them.
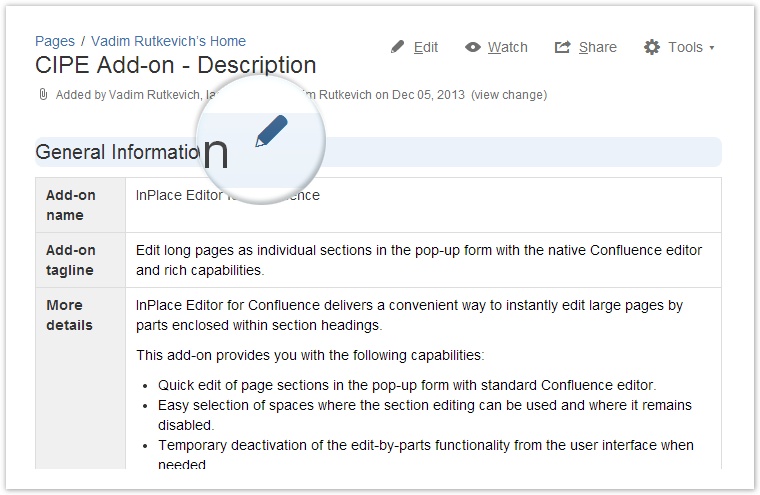
Clicking the icon takes you to the native Confluence editor where you can edit only this section alone. Also, if several people are editing different sections of the same page at the same time, you avoid the risk of editing conflicts, since all changes made in different parts are merged. In a rare case when someone is editing the same section as you are, the standard Confluence merge mechanism is invoked upon saving the changes.
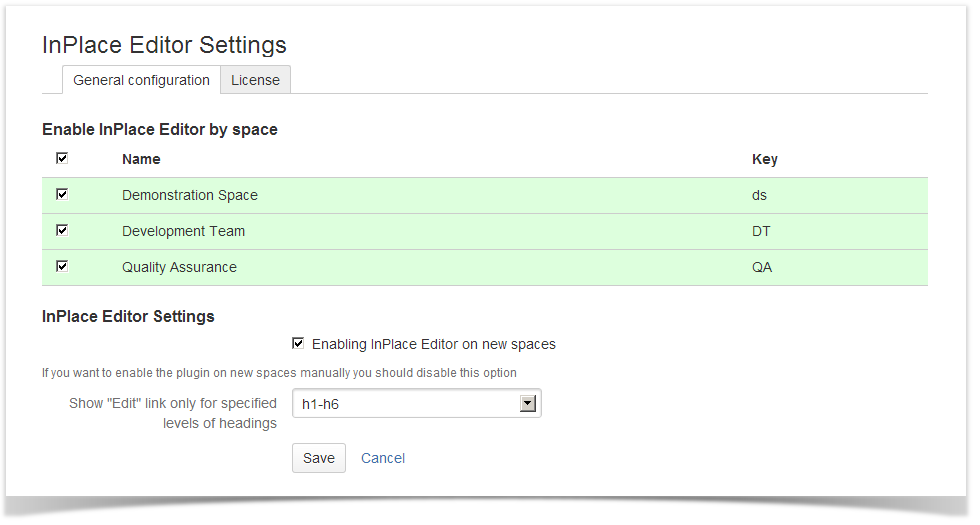
InPlace Editor works out of the box and doesn’t require complex setting up. However, it lets you activate the editor icons only for certain heading levels and disable the add-on completely for selected spaces.
To make the editing process even more productive, it would be a good idea to use InPlace Editor along with the default macro Table of Contents. While the former lets you edit a page part, the latter is a nice way to get to this part.
You can try InPlace Editor in our Live Demo without installing it or generate a 30-day free trial license and evaluate it on your Confluence.