Confluence 5 Tips: How to Develop Confluence Blueprints Addons

Recently released Conflunece 5 is no doubt a great product. New space sidebar, new Application navigator, new look and feel – at StiltSoft, we like all these features a lot. But most of all we like Confluence Blueprints that make creation of new content easy and quick.
Last week we rolled out a new version of Evernote Plugin that allows to create Confluence pages right from notes in Evernote. And Blueprints make this even easier.
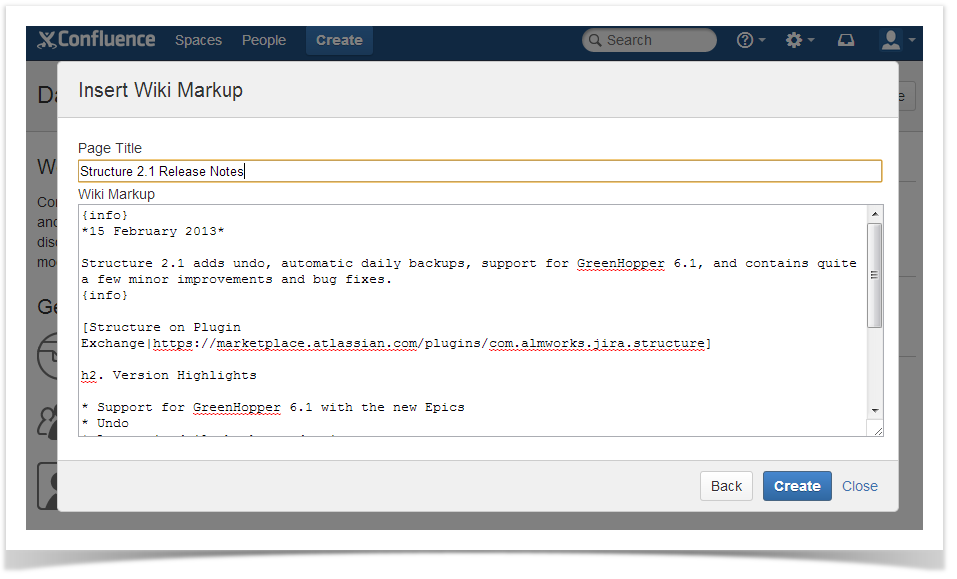
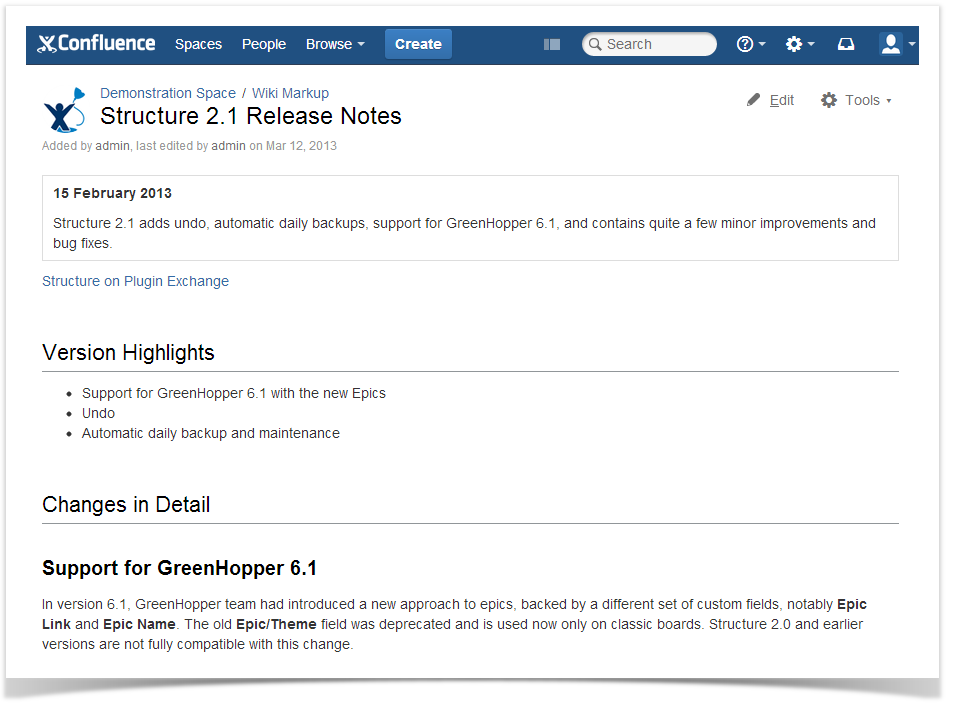
Being one of the first developers employing Blueprints when creating plugins, we’d like to share our experience with others. To do that, we developed a nifty plugin that creates pages from good old wiki markup in the View mode. Confluence Blueprints allows to create pages without entering the Edit mode!
Step 1 – Creating the Plugin Project
To create the plugin project you can issue the atlas-create-confluence-plugin command from the Atlassian SDK and enter the following parameters:
| group-id | com.stiltsoft.confluence.plugins |
|---|---|
| artifact-id | wiki-markup-blueprint-plugin |
| version | 1.0.0-SNAPSHOT |
| package | com.stiltsoft.confluence.plugins.blueprint.markup |
Step 2 – Add Plugin metadata to the POM
Now you can open the project in your favorite IDE and edit the metadata in the POM file. Let’s use the first milestone Confluence 5.1 in this example.
    <dependencies>
        <dependency>
            <groupId>com.atlassian.confluence</groupId>
            <artifactId>confluence</artifactId>
            <version>${confluence.version}</version>
            <scope>provided</scope>
        </dependency>
        <dependency>
            <groupId>com.atlassian.confluence.plugins</groupId>
            <artifactId>confluence-create-content-plugin</artifactId>
            <version>${create-content.version}</version>
            <scope>provided</scope>
        </dependency>
    </dependencies>

    <properties>
        <confluence.version>5.1-m1</confluence.version>
        <create-content.version>1.3.8</create-content.version>
        <confluence.data.version>5.1-m1</confluence.data.version>
        <amps.version>4.1.5</amps.version>
    </properties>
Step 3 – Add a Plugin Module to the Plugin Descriptor
At this step let’s add Blueprints modules to the plugin descriptor atlassian-plugin.xml:
<web-item key="wiki-markup-blueprint-item" i18n-name-key="wiki.markup.blueprint.name" section="system.create.dialog/content">
        <description key="wiki.markup.blueprint.description"/>
        <resource name="icon" type="download" location="images/stiltsoft.png"/>
        <param name="blueprintKey" value="wiki-markup-blueprint"/>
    </web-item>
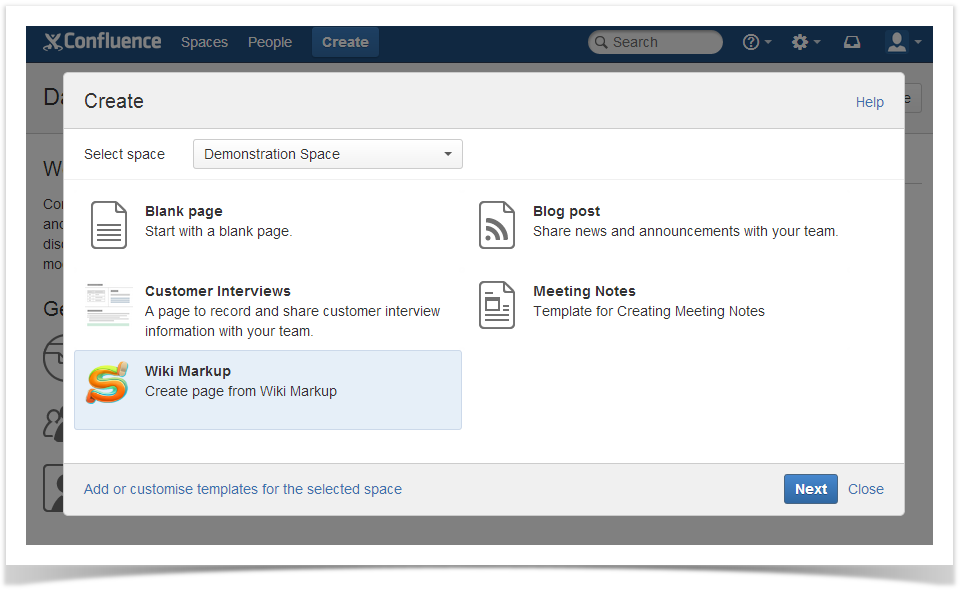
The web-item module adds the menu item Wiki Markup to the Create Dialog window. The module has the following parameters:
- the i18n-name-key attribute is the key for the name of a displayed menu item in the resource file
- the section attribute defines where the menu item will appear (to make it appear in the Create Dialog window, set it to system.create.dialog/content)
- the resource tag is used for defining the path to the displayed icon
- the param tag defines the blueprintKey parameter with the value equal to the blueprint module key declared later in atlassian-plugin.xml.
Let’s define the blueprint module:
<blueprint key="wiki-markup-blueprint" create-result="view" content-template-key="wiki-markup-blueprint-page" index-key="wiki-markup-blueprint-index">
        <dialog-wizard key="blueprint-wizard">
            <dialog-page id="insertMarkupForm" template-key="WikiMarkup.Blueprint.form" title-key="wiki.markup.blueprint.dialog.title" last="true"/>
        </dialog-wizard>
    </blueprint>
When developing Confluence Blueprints plugins, the blueprint module is a great help for developers. It has the following parameters:
- the key attribute is the module key in the descriptor
- the create-result attribute defines the behavior expected upon creation of new content with the help of Blueprints. The possible values are: edit (after completion of all steps, we’ll be taken to the Editor mode), view(after creating a page, we’ll be taken to the View mode, the page is created automatically)
- the content-template-key attribute refers to the module key content-template declared later in atlassian-plugin.xml
- the index-key attribute defines the index assigned to the created page (it’s worth mentioning that the index mechanism is quite powerful but is out of scope of this tutorial).
The dialog-wizard parameter of the blueprint module defines the dynamic behavior of what a user sees when creating content with the help of your Blueprint plugin. The parameter has the following attributes:
- the id attribute is used when formatting html content as a part of a css class in the current window viewed by a user (for example, you can pile some css styles by defining the id attribute).
- the template-key attribute defined the name of a soy function for windows content dynamic generation.
- the title-key attribute is the key for a window title displayed to a user in the resource file.
The soy function we use is defined later in the web-resource module. Below is what the templates.soy file contains:
{namespace WikiMarkup.Blueprint}
/**
 * Wiki Markup form
 */
{template .form}
    <form id="wiki-markup-form" action="#" method="post">
        <div>
            {getText('wiki.markup.blueprint.dialog.form.label.page.title')}
        </div>
        <input id="page-title" type="text" name="title">
        <div>
            {getText('wiki.markup.blueprint.dialog.form.label.markup')}
        </div>
        <textarea id="wiki-markup" name="wikiMarkup"></textarea>
    </form>
{/template}

<content-template key="wiki-markup-blueprint-page" i18n-name-key="wiki.markup.blueprint.page.name">
        <resource name="template" type="download" location="xml/content-template.xml"/>
        <context-provider/>
    </content-template>
The content-template module has the following parameters:
- the key attribute is the module key in the descriptor (used in the blueprint module).
- the resource tag defines the template used for creating of a new page.
- the context-provider tag is the optional parameter that can be used for creating a page with additional variables.
Please note that the page template created from an xml file can contain dynamic variables taken from the context. In the plugin under consideration, the template looks like as follows:
<at:var at:name="wikiInXhtml" at:rawXhtml='true'/>
The variable that can be used in the template can be taken from the form filled by a user or added directly by context-provider. In this example we use context-provide that converts the wiki markup entered by a user in the enter box to the xhtml markup used in Confluence. The context-provider code is shown below:
package com.stiltsoft.confluence.plugins.blueprint.markup;

import com.atlassian.confluence.content.render.xhtml.DefaultConversionContext;
import com.atlassian.confluence.content.render.xhtml.XhtmlException;
import com.atlassian.confluence.renderer.PageContext;
import com.atlassian.confluence.xhtml.api.EditorFormatService;
import com.atlassian.plugin.PluginParseException;
import com.atlassian.plugin.web.ContextProvider;
import java.util.Map;

public class WikiMarkupProvider implements ContextProvider {

    private EditorFormatService editorFormatService;

    public WikiMarkupProvider(EditorFormatService editorFormatService) {
        this.editorFormatService = editorFormatService;
    }

    @Override
    public void init(Map<String, String> params) throws PluginParseException {
    }

    @Override
    public Map<String, Object> getContextMap(Map<String, Object> ctx) {
        try {
            String wikiMarkup = (String) ctx.get("wikiMarkup");
            String xhtml = editorFormatService.convertWikiToEdit(wikiMarkup, new DefaultConversionContext(new PageContext()));
            ctx.put("wikiInXhtml", xhtml);
        } catch (XhtmlException ignored) {
        }
        return ctx;
    }
}
And finally, let’s define the web-resource module in atlassian-plugin.xml:
    <web-resource key="blueprint-resources" name="Blueprint Resources">
        <transformation extension="js">
            <transformer key="jsI18n"/>
        </transformation>
        <transformation extension="soy">
            <transformer key="soyTransformer">
                <functions>com.atlassian.confluence.plugins.soy:soy-core-functions</functions>
            </transformer>
        </transformation>
        <resource type="download" name="wiki-markup.css" location="css/wiki-markup.css"/>
        <resource type="download" name="templates-soy.js" location="soy/templates.soy"/>
        <resource type="download" name="wiki-markup.js" location="js/wiki-markup.js"/>

        <dependency>com.atlassian.confluence.plugins.confluence-create-content-plugin:resources</dependency>
        <context>atl.general</context>
        <context>atl.admin</context>
    </web-resource>
You can learn more about parameter values used in the web-resource module on the module documentation page.
Please note that you should set the dependency from the resources com.atlassian.confluence.plugins.confluence-create-content-plugin:resources. Besides, you should register your Blueprint plugin in wiki-markup.js as shown below:
(function ($) {
    Confluence.Blueprint.setWizard('com.stiltsoft.confluence.plugins.wiki-markup-blueprint-plugin:wiki-markup-blueprint-item', function() {
    });
})(AJS.$);
Step 4 – Use the plugin to create pages from the wiki markup
You won’t believe it, but this is almost the end of the tutorial. If you did everething right, you can install the plugin and start using it.
Moreover, you can download the plugin source code or try and go through all the steps yourself. If you have any question about plugin development for Confluence, you can contact our technical support and we will help you out.


