Integration of Yellowfin and Confluence

April 21, 2015
#How To#Confluence
13 min

The modern world abounds with enormous amounts of data that remain just characters and digits without a tool that can aggregate, process and visualize this data for better perception of information. Yellowfin is an analytic software solution that allows you to maximize efficiency of your business intelligence with numerous reports and dashboards. It supports multiple data sources, such as relational databases, multi-dimensional cubes or in-memory analytical databases.

In this blog post we will review integration between Yellowfin reporting platform and Atlassian Confluence for quicker team collaboration.

Standard Integration Capabilities

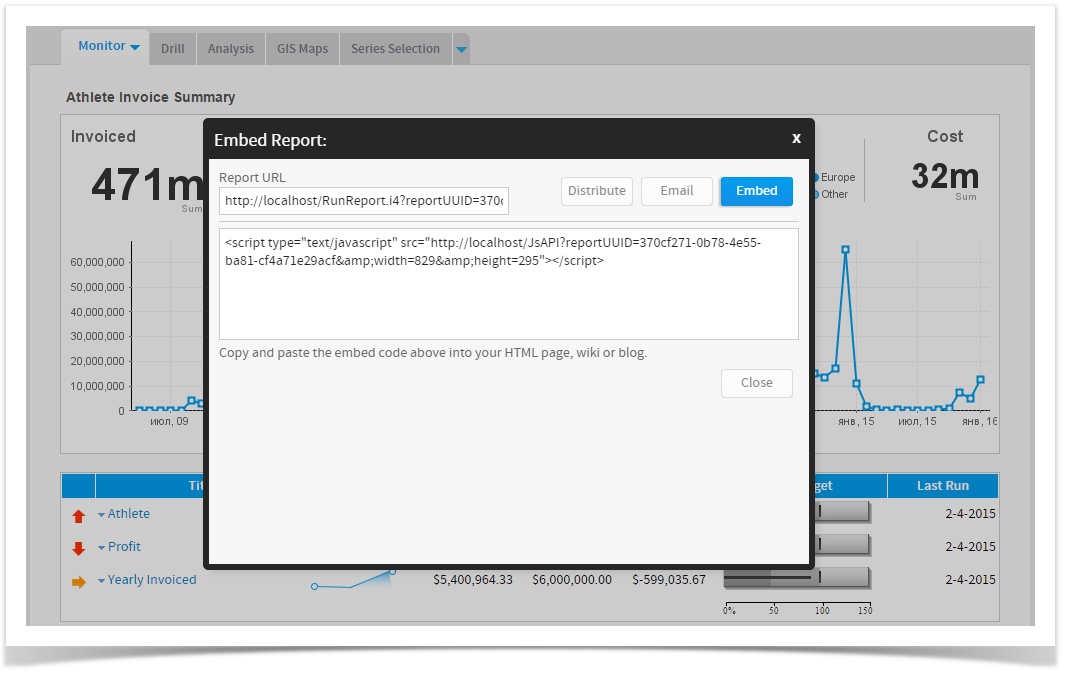
Yellowfin is equipped with JavaScript API, which allows you to embed JavaScript code snippets onto your web pages. You can embed either reports or dashboards onto your pages with the JS code snippets automatically generated in Yellowfin.

Yellowfin and Confluence

A generic code snippet will look like the following one:

//JS code to embed the report
<script type="text/javascript" src="http://yellowfin_server/JsAPI?reportUUID=370cf271-0b78-4e55-ba81-cf4a71e29acf&width=829&height=295"></script>

//JS code to embed the dashboard
<script type="text/javascript" src="http://yellowfin_server/JsAPI?dashUUID=9a31442d-d8a6-4aad-ad11-d342db606b64&width=800&height=400"></script>

The basic script includes address of the Yellowfin server, path to JavaScript API and the size of the reporting area in pixels. As usual, you will have to include the login and password in the JS code if you want to embed it into some external resource.

//JS code to embed the report
<script type="text/javascript" src="http://yellowfin_server/JsAPI?reportUUID=370cf271-0b78-4e55-ba81-cf4a71e29acf&width=829&height=295&username=admin@yellowfin.com.au&password=test"></script>

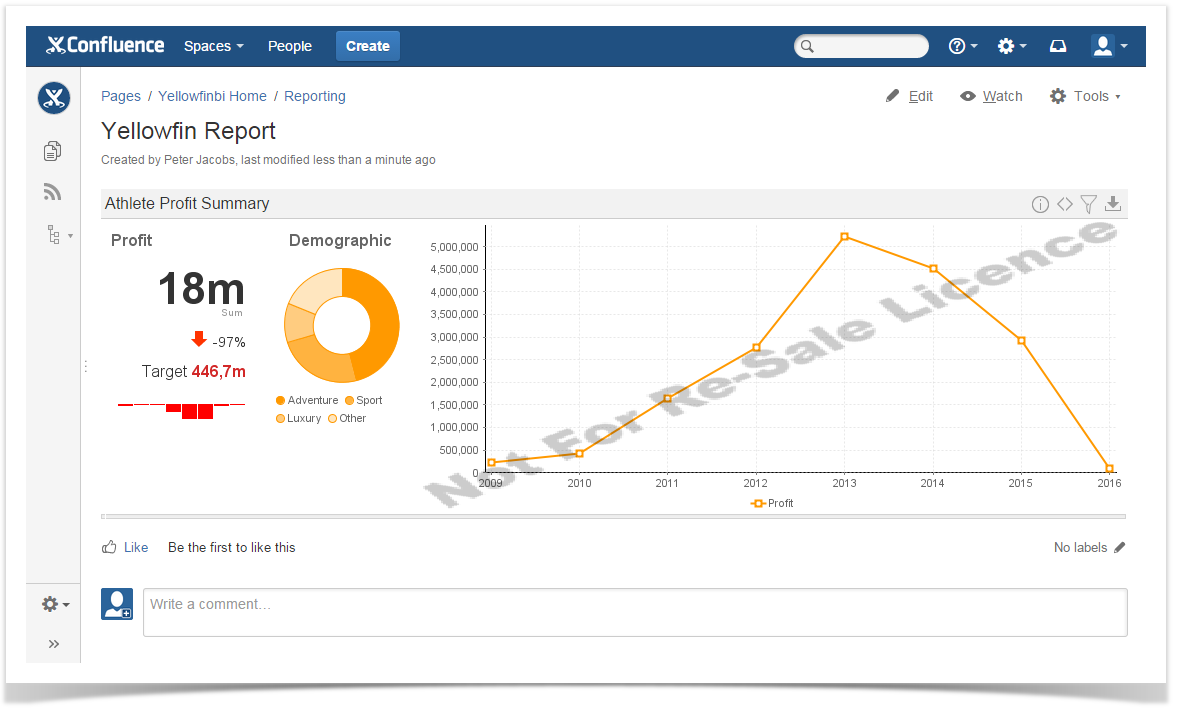
So what can you do with this JavaScript code in Confluence? You can create a new page and add HTML macro, which you can further paste your report or dashboard code into.
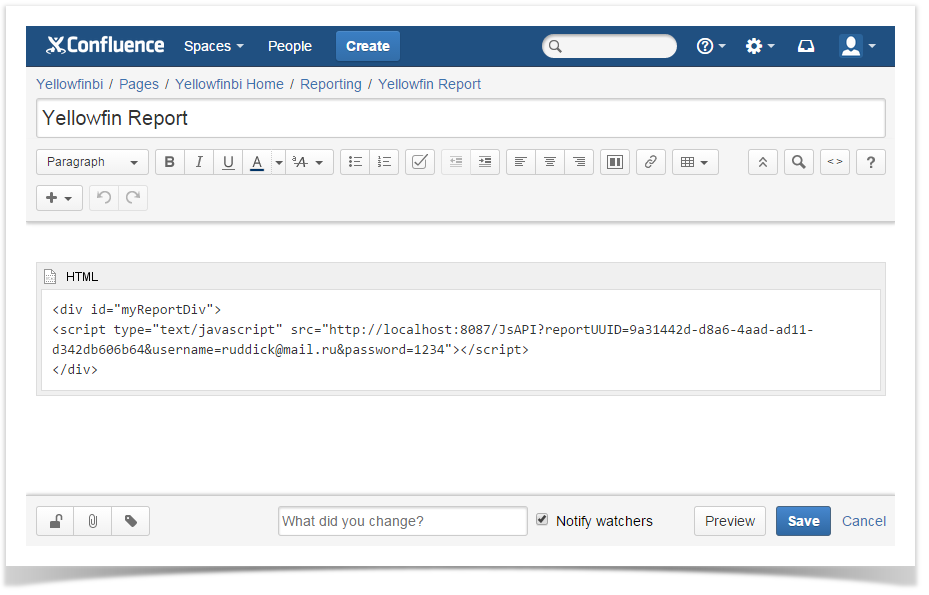
Yellowfin and Confluence

Once you save the page, you will be required to enter the credentials once again and then the report will be generated.

Yellowfin and Confluence

You can embed multiple reports per Confluence page and get data visualized in one place.

This way of embedding Yellowfin data is not very convenient as it exposes your credentials and all the time you need to verify JavaScript code as you can make any mistake in it.

Inserting Yellowfin Reports via User Macro

A better way to embed Yellowfin reports and dashboards into your Confluence pages is to write a user macro with the interface for entering parameters.

Navigate to Administration console > Configuration and select User macros. Once the page opens, click Create a user macro.

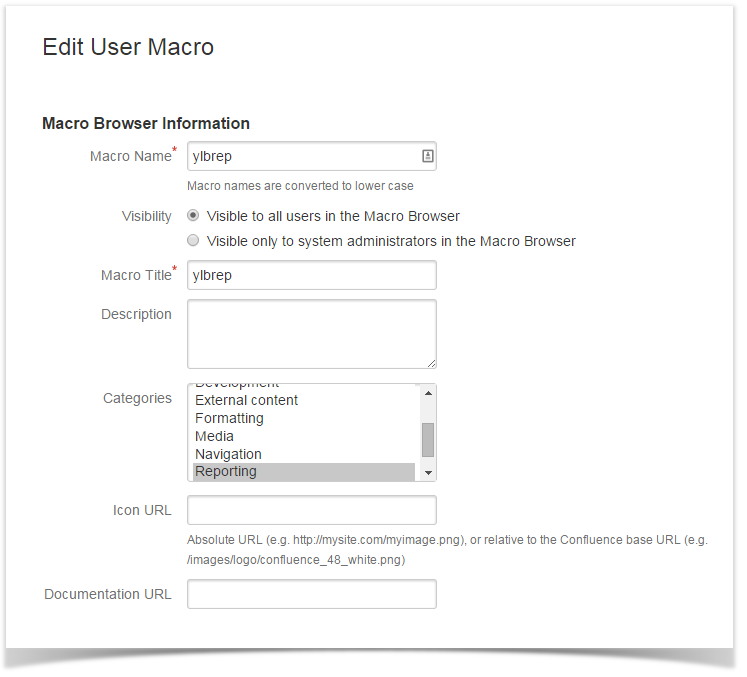
On the opened page, specify the basic information about the user macro. You need to enter the user macro name which will be used for inserting the macro on the page, define its visibility and select the category, which the your user macro will be associated with.

Yellowfin and Confluence

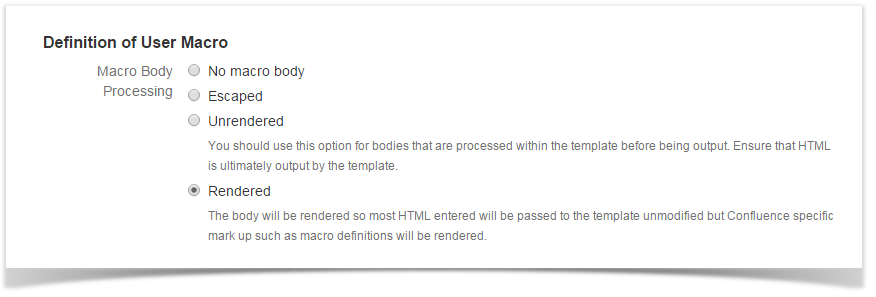
For the Macro Body Processing, select ‘Rendered’ so Confluence will render the content received from Yellowfin API.

Yellowfin and Confluence

As the macro template enter the following code:

## @param elementId:title=Element ID|type=string|required=true|desc=Enter the Element iD
## @param reportUUID:title=UUID|type=string|required=false|desc=Enter the report UUID
## @param showFilters:title=Show Filters|type=boolean|required=false|desc=Enable the information showing
## @param showExport:title=Show Export|type=boolean|required=false|desc=Enable display of page links
## @param height:title=Height|type=int|required=false|desc=Enter height of the report
## @param width:title=Width|type=int|required=false|desc=Enter height of the report
 
<ac:structured-macro ac:name="html">
    <ac:parameter ac:name="atlassian-macro-output-type">INLINE</ac:parameter>
    <ac:plain-text-body><![CDATA[<div id="$paramelementId">

//Both Confluence and Yellowfin are installed on the local computer. If instances are installed on different servers enter the appropriate address of Yellowfin server.
<script src="http://127.0.0.1:8087/JsAPI" type="text/javascript"></script>
<script type="text/javascript">
	var options = {};
		options.elementId = '$paramelementId';
		options.reportUUID = '$paramreportUUID';
		options.username = 'youremail@example.com';
		options.password = 'yourpassword';
		options.showFilters = '$paramshowFilters';
		options.showExport = '$paramshowExport';
		options.width = '$paramwidth';
		optionsheight = '$paramheight';
	yellowfin.loadReport(options);
</script>

</div> </ac:plain-text-body>

So let’s divide this code into snippets and see what each piece of it does.

This code snippet defines the set of input elements available in the macro browser. For each input element you need to define its name, title in the macro browser, type, required or not, and text description of the input element. You can find detailed information about parameters in user macros in Confluence documentation.

## @param elementId:title=Element ID|type=string|required=true|desc=Enter the Element iD
## @param reportUUID:title=UUID|type=string|required=false|desc=Enter the report UUID
## @param showFilters:title=Show Filters|type=boolean|required=false|desc=Enable the information showing
## @param showExport:title=Show Export|type=boolean|required=false|desc=Enable display of page links
## @param height:title=Height|type=int|required=false|desc=Enter height of the report
## @param width:title=Width|type=int|required=false|desc=Enter height of the report

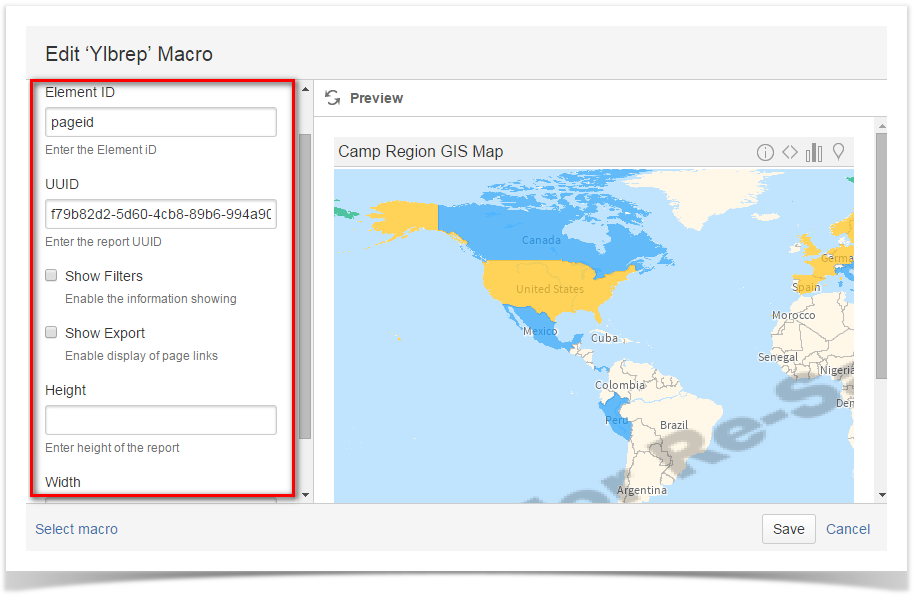
The screenshot below illustrates these input elements in the macro browser.

Yellowfin and Confluence
The next code snippets is our macro body that inserts the HTML macro that will be used for output of reports and dashboards from Yellowfin server.

//Inserts the HTML macro that will be used to wrap our Yellowfin script.
<ac:structured-macro ac:name="html">
    <ac:parameter ac:name="atlassian-macro-output-type">INLINE</ac:parameter>
    <ac:plain-text-body><![CDATA[<div id="$paramelementId">

//Calls Yellowfin script that will fetch the report or dashboard from Yellowfin server.
<script type="text/javascript">
	YELLOWFIN SCRIPT GOES HERE
</script>

</div> </ac:plain-text-body>

We want to point your attention to the specific HTML element that will be used for output of Yellowfin report/dashboard stored in the tag shown below. Our user macro will allow you to enter its ID right in the macro browser, so you will be able to insert multiple reports and dashboards on the same page without any issues. The $paramelementId parameter will take the value entered as Element ID and paste it into our user macro.

<ac:plain-text-body><![CDATA[<div id="$paramelementId">
</div> </ac:plain-text-body>

And the last part of out user macro is the call of Yellowfin script that will make a request to its JavaScript API on the server and fetch the required report with the defined parameters. As you can see $param+parameterName is used to fetch the value defined in the macro browser and insert it into the script. In Yellowfin documentation you can find the fullt list of parameters for reports and dashboards. The example below provides a range of basic parameters required for output of the report, the similar code can be used for dashboards. You can alternate the parameters or remove the unnecessary ones if needed. Some parameters are mutually exclusive so please consult Yellowfin API documentation before you start.

<script src="http://127.0.0.1:8087/JsAPI" type="text/javascript"></script>
<script type="text/javascript">
	var options = {};
		options.elementId = '$paramelementId';
		options.reportUUID = '$paramreportUUID';
		options.username = 'youremail@example.com';
		options.password = 'yourpassword';
		options.showFilters = '$paramshowFilters';
		options.showExport = '$paramshowExport';
		options.width = '$paramwidth';
		optionsheight = '$paramheight';
	yellowfin.loadReport(options);
</script>

Once you complete save the user macro.

Inserting User Macro

Open the necessary Confluence page and switch it to the edit mode.

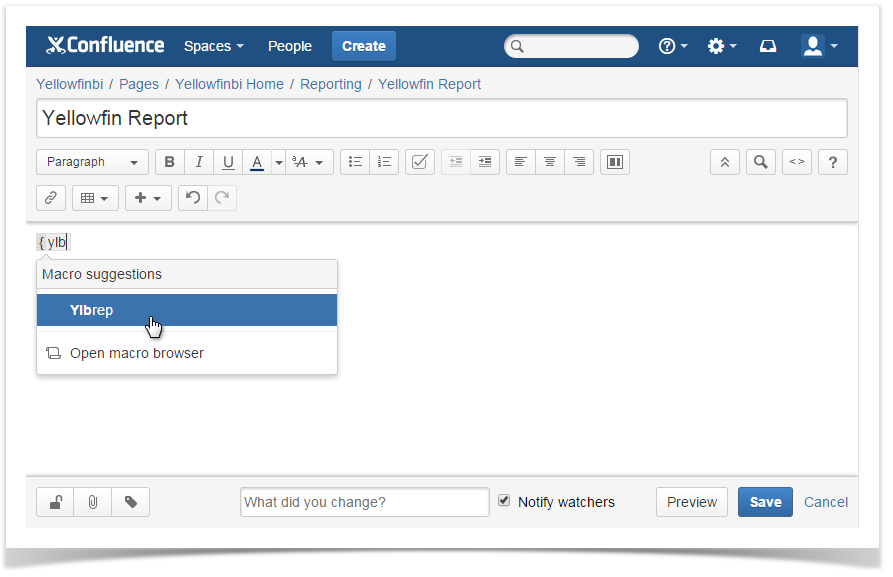
Start entering {Ylbrep} and select your user macro. Name of your user macro may vary if you set a different one.

Yellowfin and Confluence

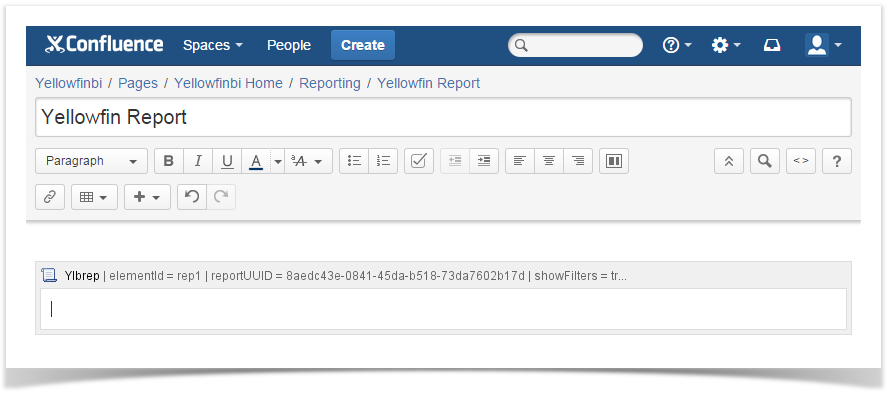
Then just enter the required Element ID and insert report UUID from Yellowfin server and that’s it. If needed, enable display of filters and report export, and specify the required width and height of the report.

Once you save the macro, its parameters will be saved in its body.

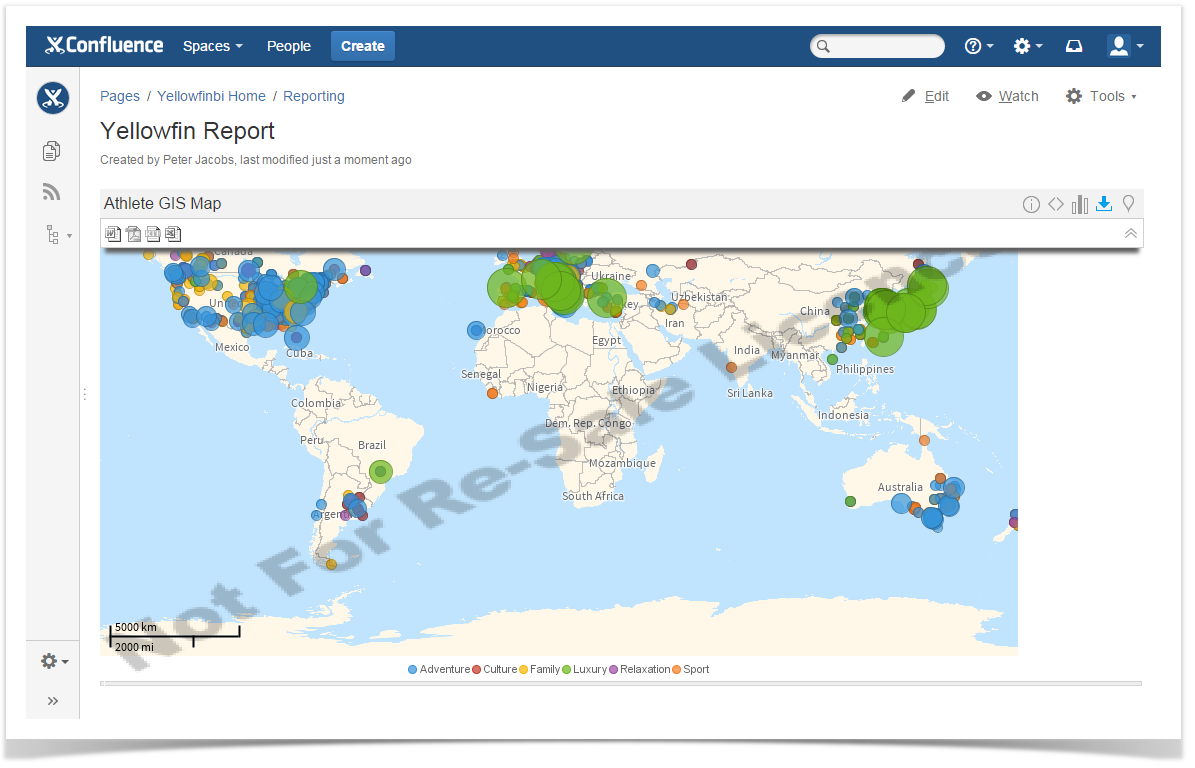
When you save the page the report will appear on it and you can work with it as in Yellowfin itself. The report will be updated upon each reload of Confluence page, so if new data is continuously supplied to Yellowfin you will get all the time the updated data.

Yellowfin and Confluence

As you can see it is not a problem to quickly and easily integrate Yellowfin and Confluence. Yellowfin Javascript API is easy to understand, use and customize. Besides the generic embedding of the report or dashboard, you can insert them with the already filtered results and save a bit of your time.