Two-Minute How-To: Filtering Tables in Confluence Cloud

What is the major advantage of storing data in structured tables? We believe that the answer is the ability to find the relevant information in seconds, be comfortable with your data, and gain insights exactly when you need it. No matter what kind of tables you have and what size they are, you can filter them in Confluence Cloud in the blink of an eye.
In this post, you’ll learn how to filter table data, search for values within the whole table, and hide unnecessary columns.
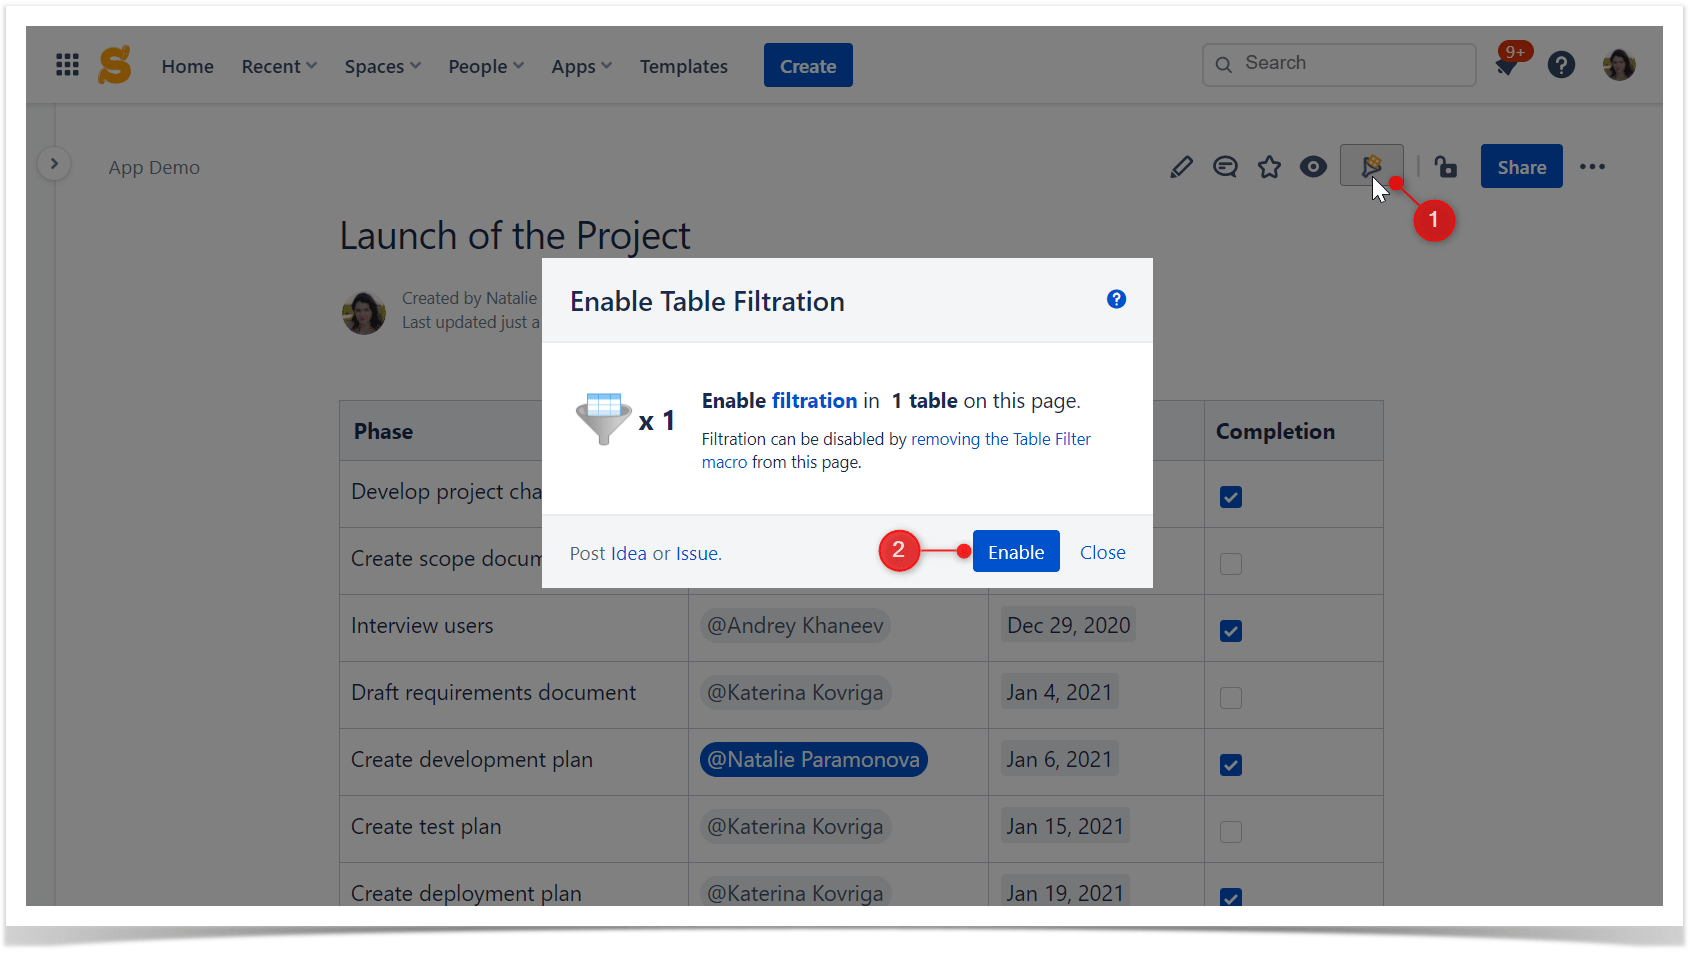
To get started, you need to enable filtration for tables on a Confluence page by adding the Table Filter macro in the page view mode.
1. How to filter table data
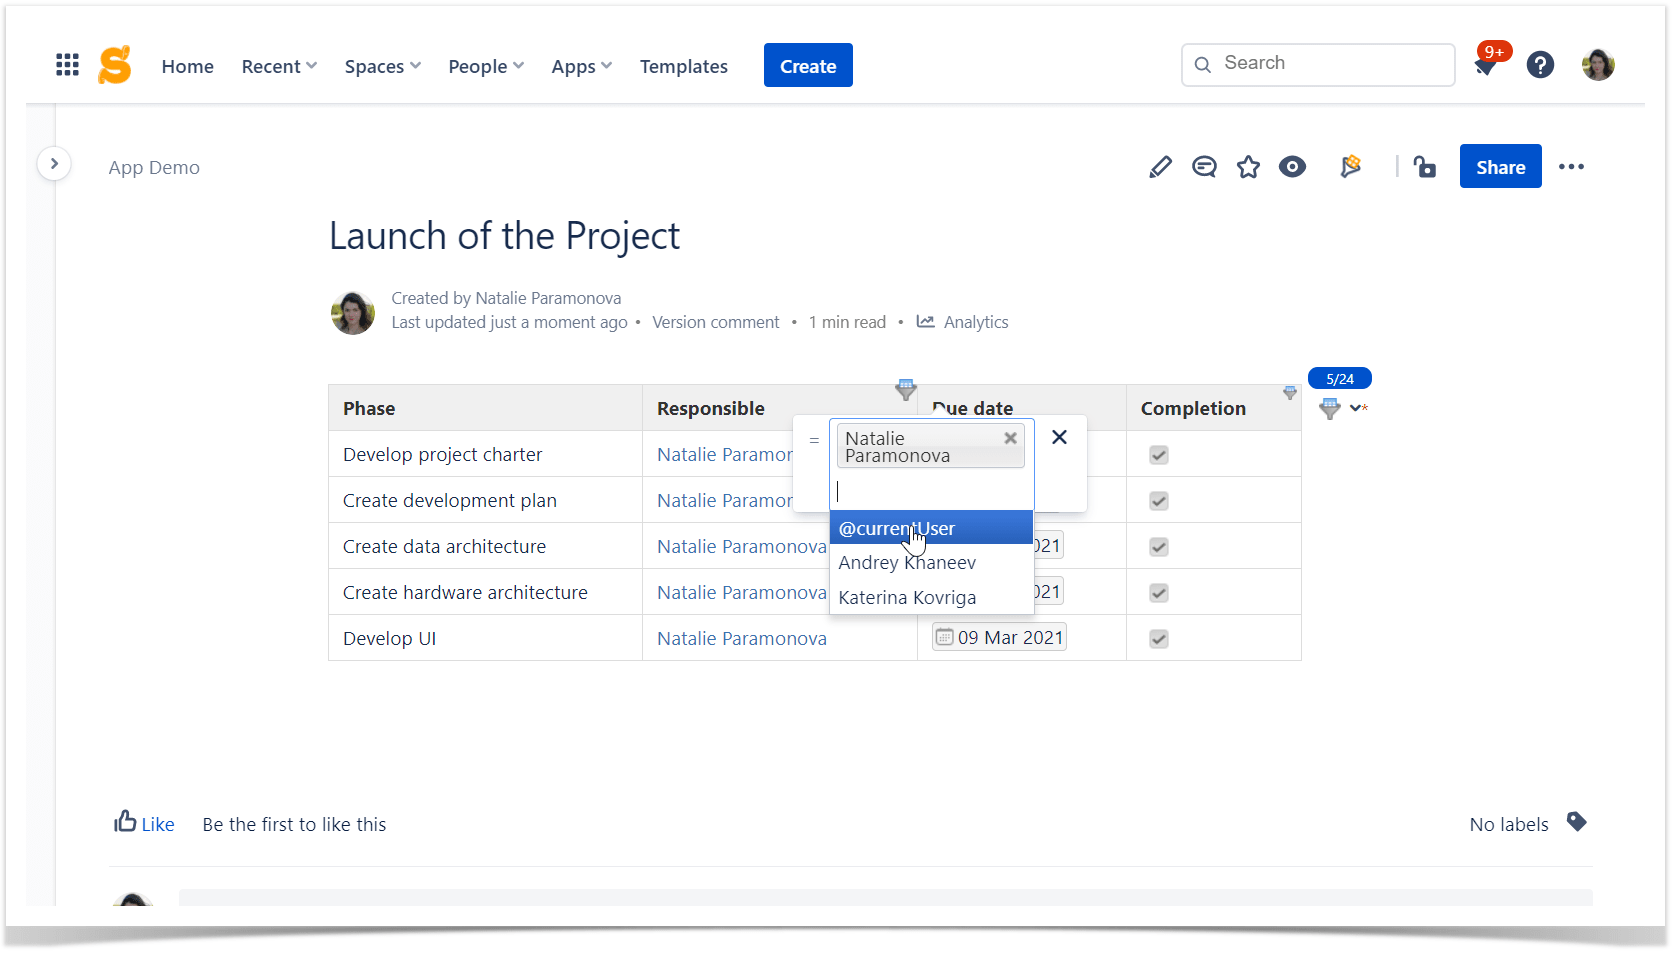
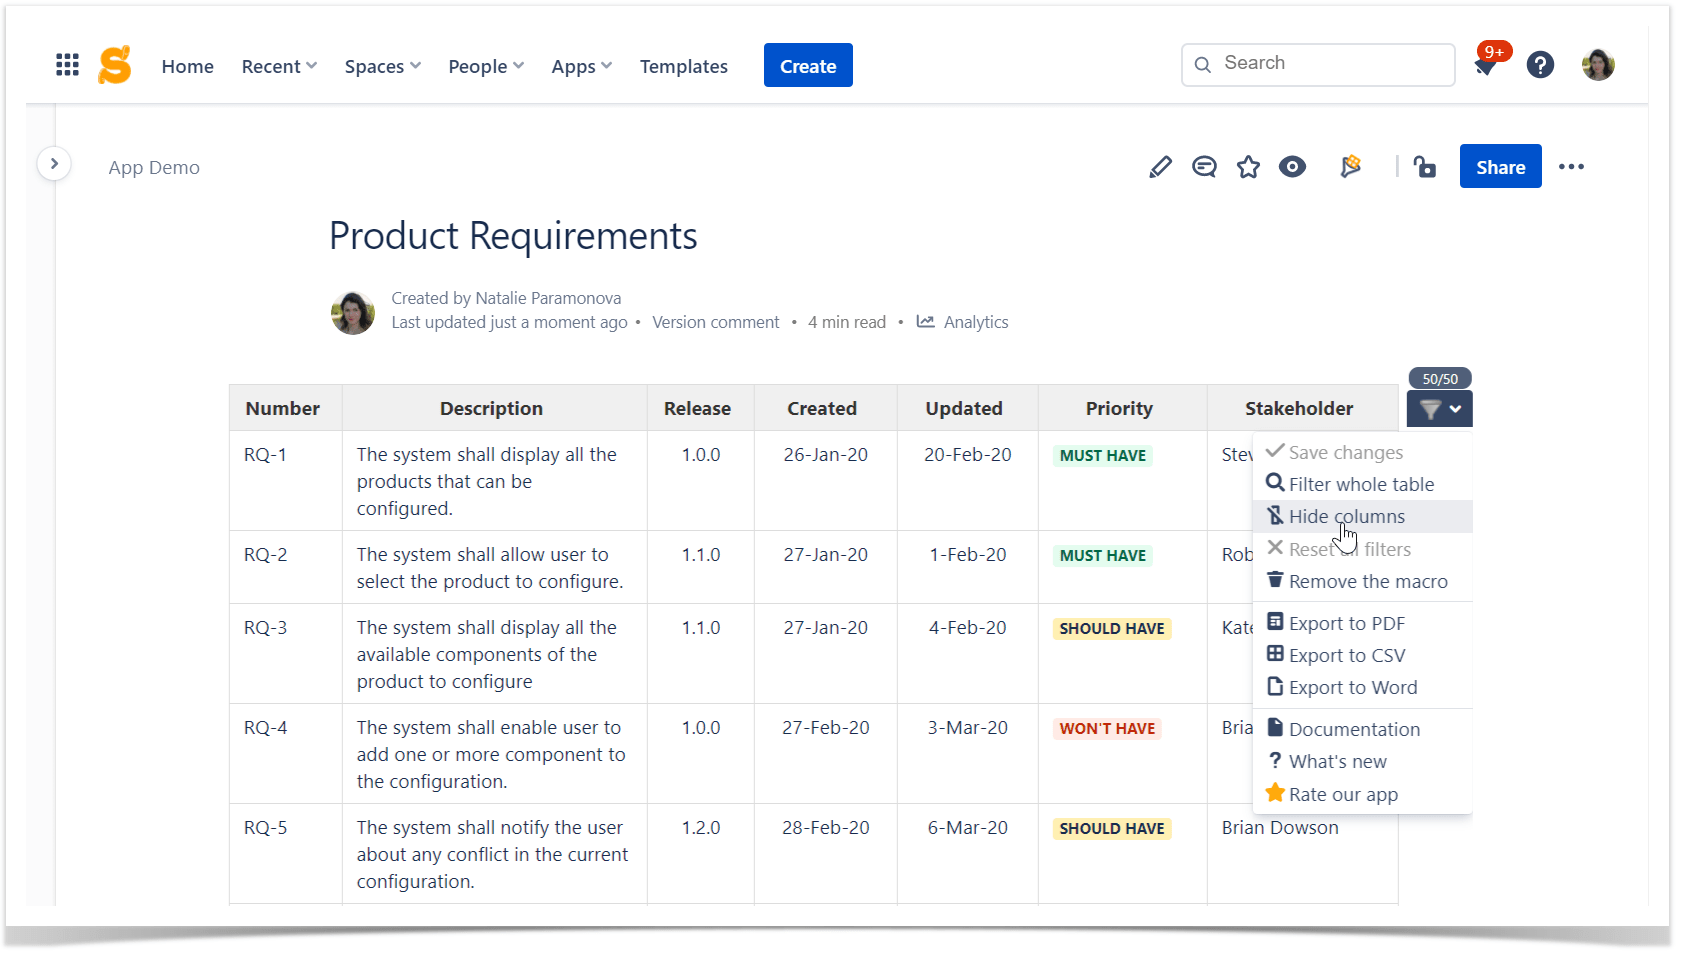
To filter table data, hover over table columns, click the funnel icon in a table header, type or select values, and voila, you filtered the table. Two figures in the upper right corner of the table indicate the number of filtered rows in relation to the total number of entries.
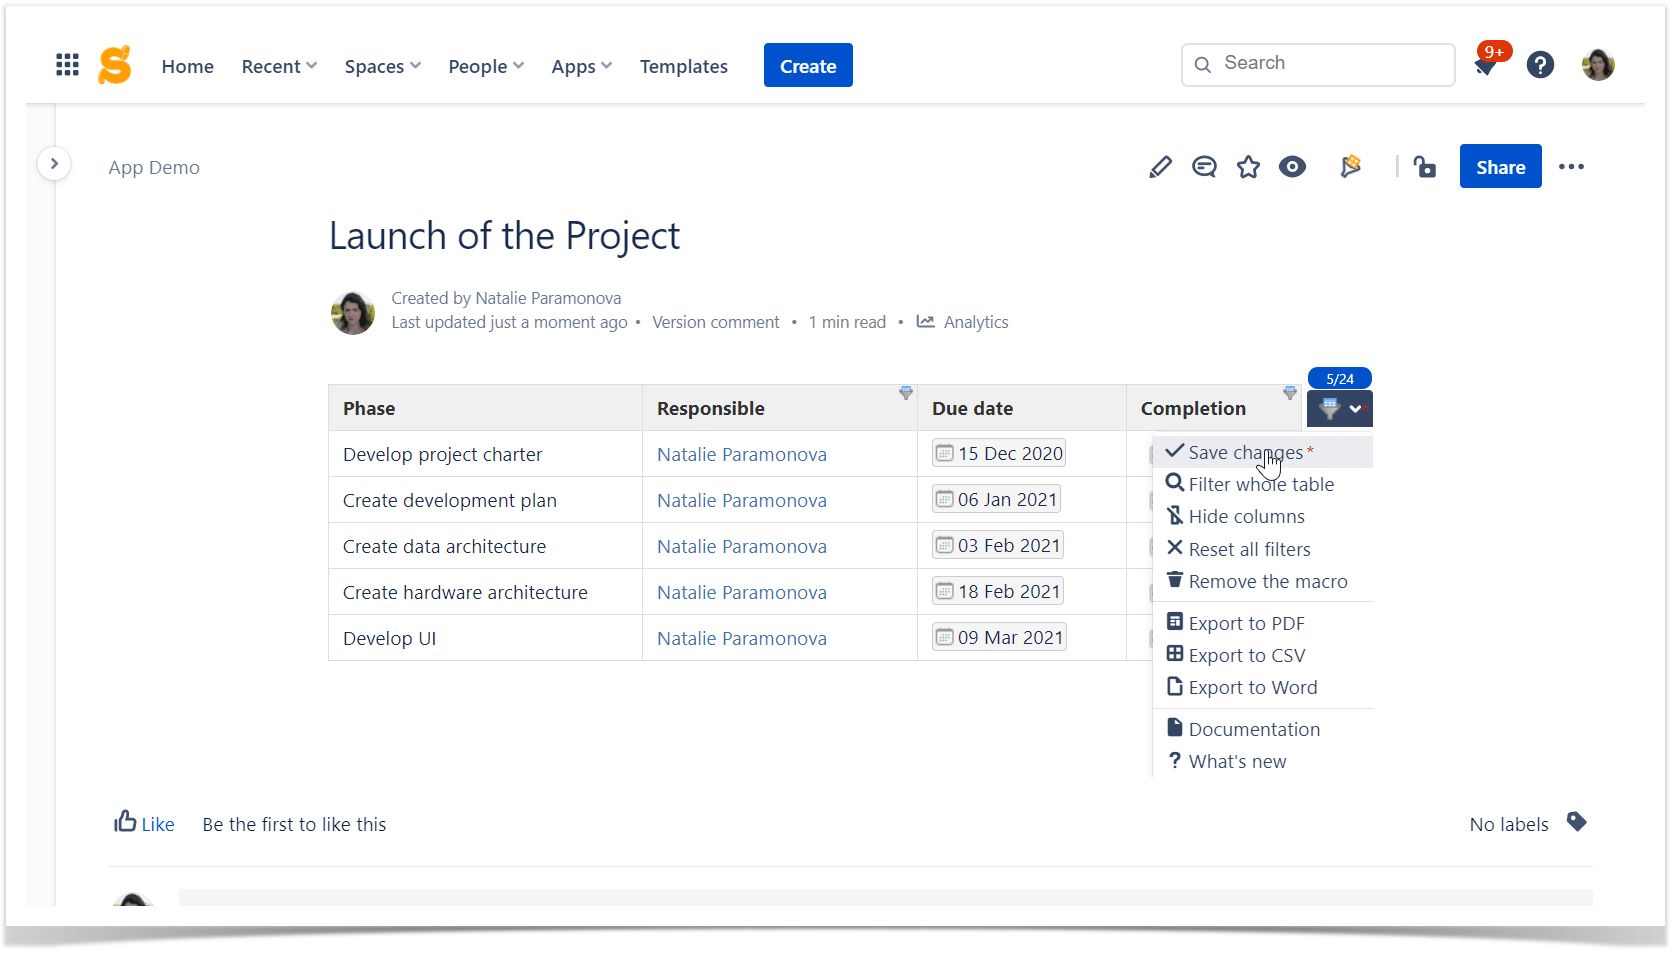
If you’d like to stick to the results of your filtration, you can save these changes.
Pro tip:
Learn more about using Spreadsheets in Confluence
2. How to search within the whole table
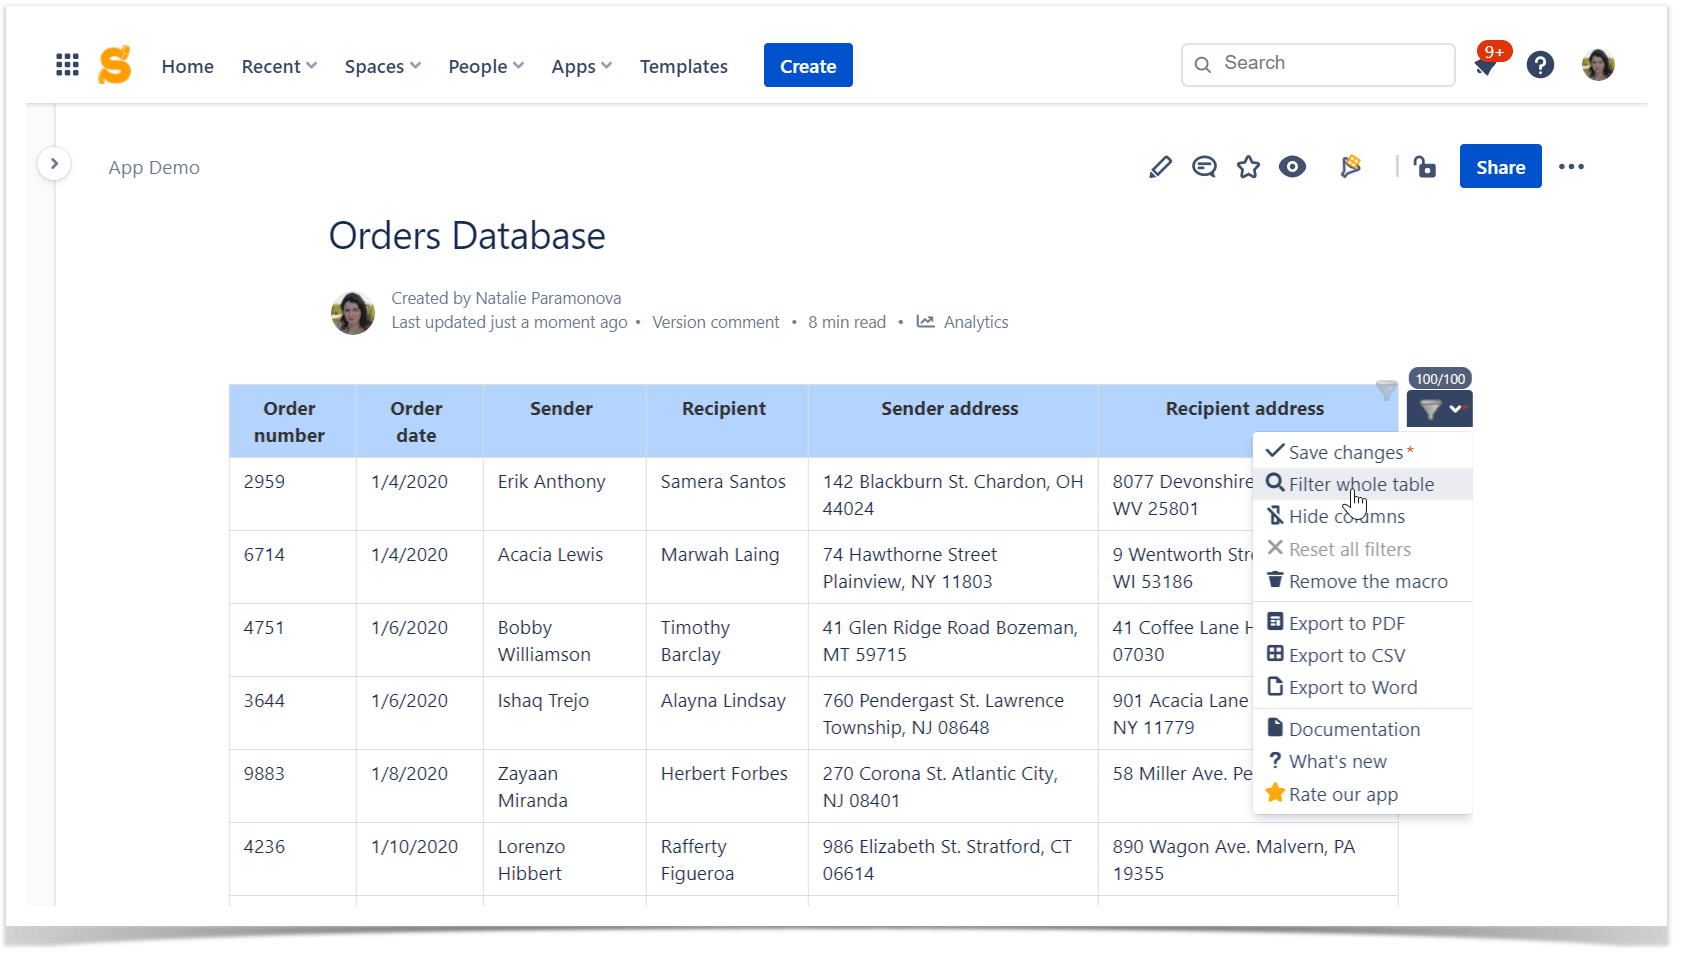
In case you don’t know exactly in what column to look for values, you can try the global filter that allows filtering the whole table at once. Use the regular expressions for the advanced search, for instance, when you need the partial word search or search for multiple items.
3. How to hide columns
If your table is large and has a lot of columns, you can hide unnecessary ones to make it readable and easier to navigate.


